This post may contain affiliate links. If you make a purchase through links on our site, we may earn a commission.
Since we’re deep in holiday baking I thought I’d share some Baking Tips, tricks, and thoughts about how to bake at your best. Mostly I’ll be focusing on cookies, but many of these thoughts apply to cakes, pies, and breads, well, any baked good.
Baking from scratch is fun! And if you have a few pointers under your belt, you too will be having fun with holiday baking. Heck, grab the kids and have them help out in the kitchen too. What better way to learn proper techniques and methods than from their parents or grandparents!
Want to learn more about flour? Check out my post that’s chock full of information on flour!
Once you’ve baked up your goodies, I have some tips on how to ship baked goods for you too!
Learn how to keep brown sugar soft as well.

We appreciate your support
Before you start
Always read the recipe. And understand what it’s asking you to do. I can’t tell you the number of times I’ve seen comments from people that weren’t prepared to make the recipe. Or, that I too have gone in and realized the recipe required something I wasn’t prepared for.
Save yourself the headache and the time (and money in ingredients) by reading the full recipe.
Get all your ingredients ready and have them at the correct temperature.
And, if a recipe tells you that it’ll take 10-12 minutes to bake, start checking on the low end of the time. You don’t want your baked goods to burn.

Ingredient substitutions
There’s a reason the recipe calls for what it does. It may add flavor, improve the texture, or improve the appearance of the baked good.
The best approach when baking a recipe is that you should find a recipe that uses the specific ingredients you have available to you rather than trying to make the ingredients work in a recipe that calls for something else.
As you may know, baking is a science, and making any changes can affect the final dish. Always proceed with caution when making substitutions.
When should ingredients be cold?
In general, you want to use cold ingredients for baked goods with a flaky texture like pie crusts, biscuits, scones, and puff pastry.
Make sure your butter, eggs, cream, milk, etc. are all refrigerator cold before making the dough.
Cold butter will not melt as you’re making the dough. It’s important that the fat remain solid before the baked good goes into the oven. The solid fat will melt in the oven, creating those little pockets of flakiness that add to the texture of the final baked good.
When should ingredients be at room temperature?
In baking, room temperature is somewhere around 68-72° F. This is the temperature at which butter is soft but not melting or greasy. If your butter gets to the point where it starts looking greasy or is starting to melt, pop it back in the fridge for a few minutes before using it to cream with sugar.
Room temperature ingredients emulsify much more easily into the batter, which creates a uniform texture throughout your baked goods. It also gives more volume to your batter when at room temperature.
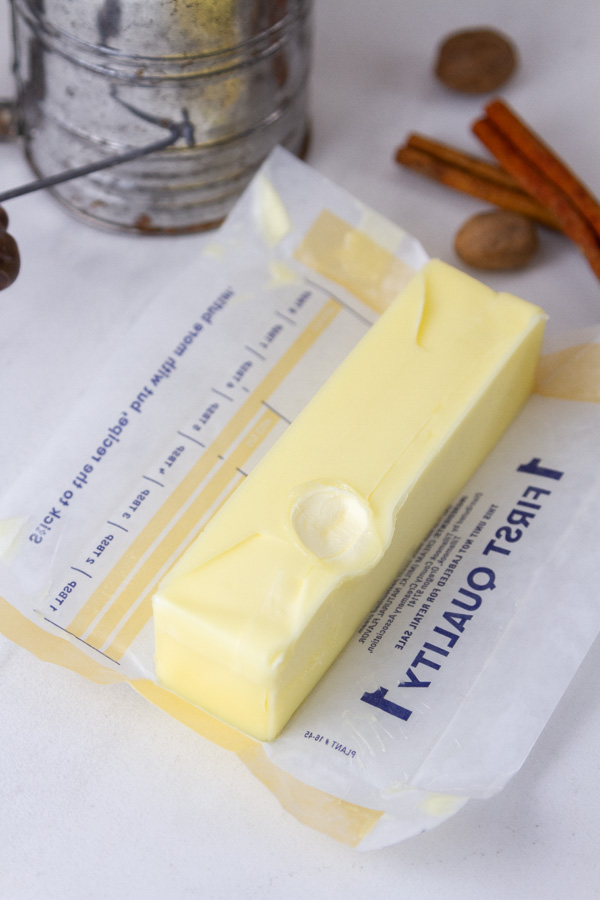
When you press on softened or room temperature butter your finger will make an indent, but it won’t slide around. Leave the butter out on the counter for 45 minutes to an hour, some of this will depend on where you live. Where I live in SoCal butter will soften much faster than if I lived in Minnesota in the winter.
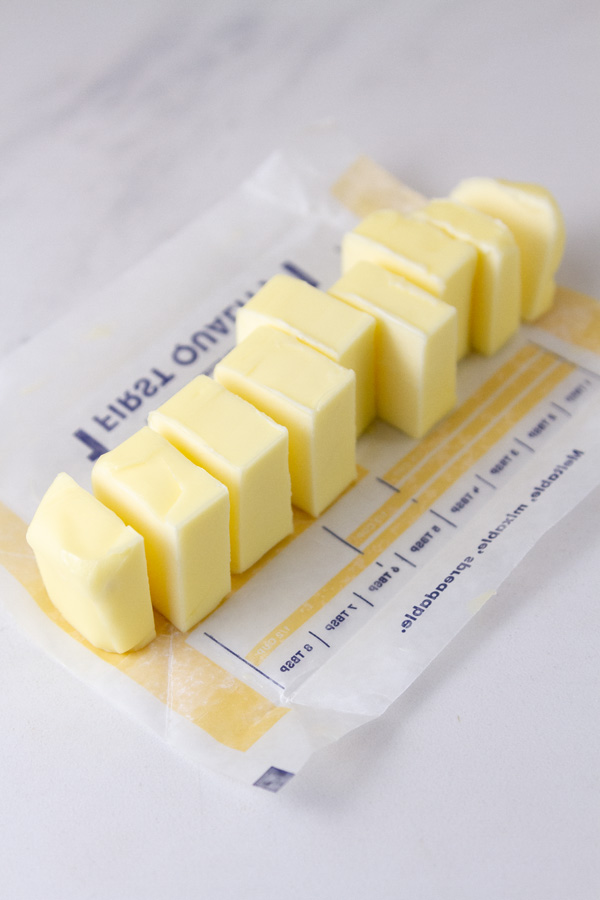
If you’ve forgotten to pull the butter out early, you can quickly soften it by cutting it into small pieces and spreading them out on a plate. The small pieces will come to room temperature much quicker than one large stick of butter.
Egg whites will not whip up to their highest volume if they are cold, so egg whites should be at room temperature.
To bring eggs up to room temp quickly, place the whole eggs (before cracking) in a bowl of warm, not hot, water, and leave them there for 5-10 minutes.
Measuring by volume
Sure, we’ve all read that measuring by weight is best. And, that may actually be true, but I know most Americans, myself included, still measure by volume. So, we should all learn how to measure as accurately as possible.
To measure liquids, be sure to get down to eye level to see that your measurement is accurate.

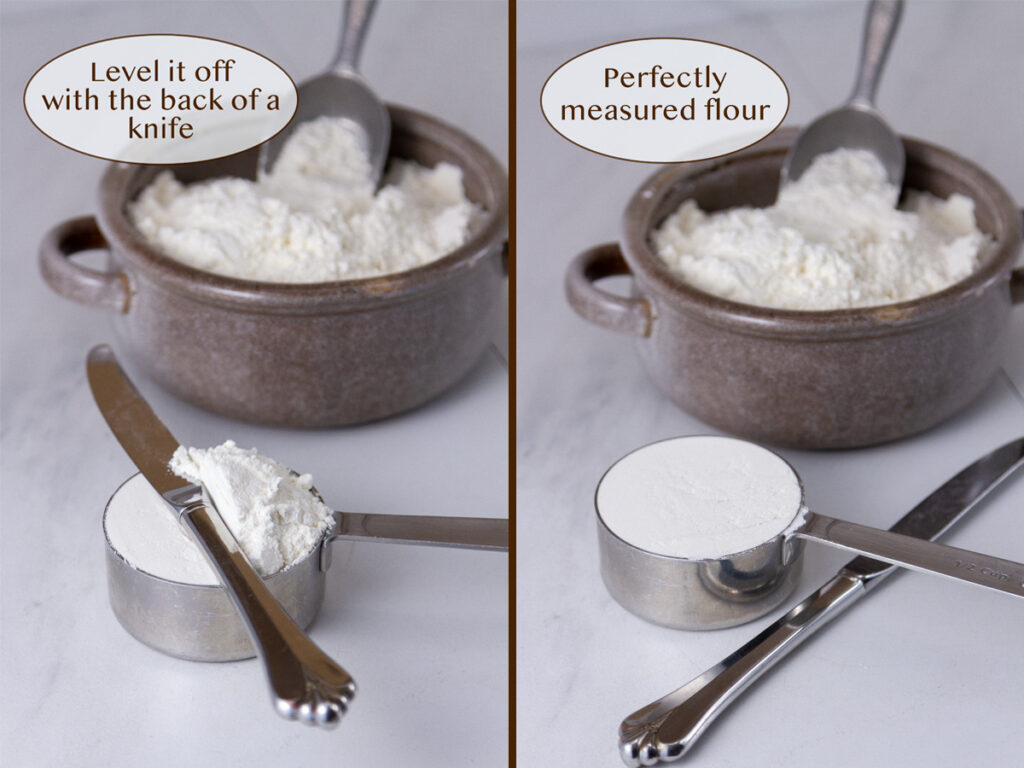
To measure dry powdery ingredients, especially flour but also powdered sugar, cornstarch, and cocoa powder, you’ll want to gently stir and fluff up the ingredients with a spoon. This helps to aerate and break up any clumps.
Lightly scoop the ingredient into the measuring cup, overfilling it, and being careful not to pack it down.
Level it off with the back of a knife.
Sifted flour
I think sifting flour is a bit old-fashioned, as most recipes don’t require it any longer.
Many flours are already sifted when you purchase them. But, sifting the flour means you are incorporating more air into it, ensuring less flour in the measuring cup, and a better textured cookie.
4 cups sifted flour means, you sift the flour first, then measure it. I like to sift the flour onto a large sheet of parchment paper or wax paper. Then, lightly scoop the flour into the measuring cup and level it off with the back of a knife. Any unused sifted flour can be returned to the canister.
Alternatively, if a recipe says, “4 cups flour, sifted”, this would mean that you measure the flour first, then sift the total measured amount.
Measuring sticky ingredients
To make it easier to measure sticky ingredients like honey, molasses or peanut butter, spray the measuring cup with non-stick cooking spray first, then pour in the honey. The spray makes it easier to get all the sticky stuff out of the cup.
Mixing the dough
Over mixing the dough can result in flatter, crisper cookies. When you over mix, you are over aerating the dough, which causes the cookies to rise too high, and then fall, leaving you with flatter cookies. Stop mixing when there are no longer any flour streaks in the bowl.
When using a hand mixer, my mom always taught me to place the bowl in the sink to mix it. That way, when the little bits splatter out (and they always splatter out!) they splatter onto the sides of the sink, and not on your walls! Makes clean up much easier!
Baking
As you bake cookies, allow the cookie sheets to cool between each use. Or, you may want to invest in multiple cookie sheets.
Otherwise, the dough starts to bake and melt as soon as you put it on the cookie sheet. This will cause your cookies to spread too much.

Essential baking tools
There are a ton of tools that you may need depending on the recipe, what’s already in your kitchen, and your skill level. That being said, I’m suggesting here some basics that I reach for in most recipes.
And, I often mention how low tech I am in my kitchen. Most of the time I cream the butter and sugar together with a fork and some arm power. So you don’t need fancy equipment to bake tasty treats!
Insulated cookie sheets
Air bake or insulated baking sheets feature double pan layers enclosing an air pocket between the two layers that heats and circulates the air underneath your cookies so that they are not in direct contact with the heat source, and are less likely to burn.
Baked goods will bake more evenly because the cookie sheet allows the cookie time to bake so the middle comes out perfectly done and not under cooked.
Also, because the cookie sheets are not rimmed, they allow air to move around the cookies freely and promote more even browning.
They can decrease the baking time because they’re so efficient, which saves you time.
And, because there’s less burning and sticking, clean-up is quicker too.
I always place a baking sheet under cake pans, pie pans, muffin tins, etc. It makes the baked goods easy to move in and out of the oven, and it keeps any spills contained to the baking sheet for easier clean up.

Cooling racks
Cooling racks allow cookies to cool with an airflow underneath them, which helps keep the bottoms from getting overcooked or soggy.
Cookie scoops
I love using cookie scoops. They help you get uniform sizes so some cookies aren’t overbaked while some are undercooked. They help keep your fingers clean.
And, if you’re looking to make domed shaped cookies like these Brownie cookies with mocha frosting, peppermint sandwich cookies, or no bake chocolate candy cookies, the cookie scoops are a must have!
Silicone spatula
I’m always reaching for a spatula, whether it’s to mix the dough, scrape all the dough out of the bowl, or to scramble eggs in the morning. And silicone ones seem to last forever.
Silicone baking mat
Silpats or silicone baking mats help to make sure your cookies don’t stick to the cookie sheet, there’s no need to grease the cookie sheets, they help promote even baking, and help cookies to not spread as much.
And, silicone baking mats can be washed and reused, so no trash build up.
Silicone baking liners repel fat so cookies can spread more, resulting in a crispier cookie. Whereas parchment paper results in cookies that spread less for a chewier cookie.
Ingredients
Alright, we’ve talked about methods and tools, let’s talk about some of the specific ingredients and how they function or improve baked goods.
Fats like butter or shortening
Fats are used in baking to help with leavening, or getting baked goods to rise. When solid fat is creamed with sugar, a web of air is trapped between the ingredients, which makes baked goods rise.
The more fat in a cookie recipe, you’ll get a chewier cookie; and the less fat makes for a crunchier cookie.
Butter
I would say that butter is called for in most baked goods, maybe not all, but certainly a lot of them!
Of course, butter’s main role is that it adds flavor… that buttery flavor. And you need to use real butter (not margarine) to get that real flavor!
Butter makes baked goods more tender by coating the flour, thus slowing down the process of gluten formation.
Butter contains some water, and allows for steam and carbon dioxide to be trapped in the batter as it is bakes, creating steam when baked, lifting baked goods.
Vegetable shortening
Vegetable shortening contains 100% fat which means it creates baked goods that are more tender than those made with butter. It can prevent pastries like pie crusts from shrinking because of the lack of water evaporating and its higher melting point.
Vegetable shortening has a melting point of around 118° F (whereas butter melts at 90-95° F). Due to this, baked goods made with shortening tend to not spread as much.
Sugar
Besides adding sweetness, sugar affects the texture of a cookie.
White granulated sugar will give you a crispier cookie. Brown sugar will make cookies chewier and moister.
Sugar will also affect how much a cookie spreads; cookies with less sugar will be puffier than cookies with lots of sugar.
Superfine sugar
Superfine sugar, also known as caster sugar, is white sugar that is more finely ground than granulated sugar, but not as fine as powdered sugar (also known as confectioners’ sugar or 10x sugar).
It may be purchased or made. If you can’t find it at the store, or simply don’t want to buy an additional ingredient, use your food processor to make it.
Add a couple of tablespoons more than the desired amount of sugar to a food processor, and process until it feels like fine sand. The extra amount of sugar allows for the reduction in volume from grinding it.
If you have additional superfine sugar when you’re done using it, simply add the extra to back to your bag of sugar and use it in another recipe.
Superfine sugar and granulated sugar can be substituted as one for one by weight.
Baking powder
Baking powder is a complete leavening system because it has both baking soda and an acidic ingredient (cream of tartar) to activate that baking soda. It does not need an additional acidic ingredient like buttermilk or lemon in the recipe in order to leaven baked goods, and it will begin reacting as soon as it is hydrated.
One of my favorite tips about baking powder is to use {affiliate link} aluminum free baking powder. I find that the baking powder containing aluminum has a slightly off, metallic flavor that comes through in the final baked product.
Most baking powder sold is double acting nowadays. This means that the first leavening occurs when baking powder gets wet, like when you combine the dry and wet ingredients in the recipe.
This double activation is why you can’t prepare some batters ahead of time to bake later, because the baking powder has already been activated.
The second leavening occurs when the baking powder is heated.
Since baking powder already contains an acid to neutralize its baking soda, it is most often used when a recipe does not call for an additional acidic ingredient. However, this isn’t always the case.
You can still use baking powder as the leavening agent in recipes calling for an acidic ingredient.
Make sure to use fresh baking powder to give the baked goods proper leavening. You can check the best by date, or test it yourself.
How To Test Baking Powder
To test baking powder, pour 3 Tablespoons of warm water into a small bowl. Add ½ teaspoon of baking powder. Give it a light stir. The mixture should moderately fizz if the powder is fresh. If there is no reaction, toss the baking powder and buy a fresh package.
Baking soda
Baking soda is also known as bicarbonate of soda or sodium bicarbonate.
It’s is a base. Do you remember the science experiment we all did in school? Mixing baking soda with vinegar and watching a volcano of bubbles?
When you mix the base baking soda with vinegar (an acid) you get a chemical reaction which is that eruption of bubbles!. A product of this reaction is carbon dioxide.
The same exact reaction happens in our baked goods. When a recipe calls for baking soda, it usually calls for some type of acid like buttermilk, brown sugar, yogurt, lemon juice, vinegar, cream of tartar, molasses, applesauce, natural cocoa powder (not Dutch process), or honey. You need this acid in the recipe to react with the baking soda, which in turn creates carbon dioxide and allows your baked good to rise.
Baking soda is strong. In fact, it is about 3-4 times stronger than baking powder. More baking soda in a recipe doesn’t necessarily mean more lift, though. You want to use just enough to react with the amount of acid in the recipe.
Too much baking soda and not enough acid means there will be leftover baking soda in the recipe. You don’t want that; it creates a metallic, soapy taste in your baked goods.
Aluminum free baking soda
My biggest tip regarding baking soda is to always get an aluminum free one. Some brands contain aluminum and it makes the baked goods taste metallic. If it’s aluminum free, it will most likely say on the front of the package. But, there’s an easy way to tell. Check the ingredients list. If there’s aluminum, it will be listed as sodium aluminum sulfate or sodium aluminum phosphate; avoid buying a package with either of those ingredients. You want to buy baking soda with just sodium bicarbonate, monocalcium phosphate, and corn starch.
How To Test Baking Soda
To test baking soda, pour 3 Tablespoons of white distilled vinegar into a small bowl. Add ½ teaspoon of baking soda. Give it a light stir. The mixture should rapidly bubble if the soda is fresh. If there is no reaction, toss the baking soda and buy a fresh package.
Why do some recipes call for both?
Some recipes call for both baking powder and baking soda. These recipes contain some sort of acid (yogurt, brown sugar, etc.), however, the carbon dioxide created from the acid and baking soda is not enough to leaven the volume of batter in the recipe. That’s why baking powder is used as well, to add the necessary lift.
The reason for both is that sometimes you need more leavening than you have acid available in the recipe. It’s all about balance.
Another reason to use both baking powder and baking soda is that they affect both browning and flavor.
Cream of tartar
Cream of tartar is a dry, powdery, acidic byproduct of the wine making process, when they ferment grapes into wine. Its scientific name is potassium bitartrate, or potassium hydrogen tartrate or tartaric acid (which is where it gets the commercial name).
You’ll find it in the spice aisle of the grocery store. Use it for stabilizing whipped egg whites and whipped cream. Add 1/8 teaspoon per egg white to speed up the creation of foam and to help stabilize the structure of those air bubbles you’re whipping up.
It makes your meringues and angel food cakes higher and more melt in your mouth.
Cream of tartar also adds the distinctive tangy flavor and chew to snickerdoodle cookies. It’s the acid in there that prevents sugar in the cookie dough from crystalizing into crunchiness.
It’s also a leavening agent when combined with baking soda. The combination produces carbon dioxide gas.
If you ever run out of baking powder, you can substitute ¼ teaspoon baking soda plus ½ teaspoon cream of tartar for 1 teaspoon baking powder.
What can I substitute for cream of tartar?
Use 2 teaspoons lemon juice or vinegar to create the acidic effect of 1 teaspoon of cream of tartar in a recipe.
Toasted nuts
Toasting nuts before you add them into your baked goods is one of the easiest ways to kick the flavor up a notch.
Toasting nuts brings out their true nutty flavor by bringing their natural oils to the surface. This improves the overall flavor and texture by making them a bit crisper and crunchier.
Same goes with coconut, it’s so good toasted. Here’s how to toast coconut.
Let’s keep in touch
What other tips do you have? What have I missed?
If you like seeing my recipes subscribe via email in the upper right.
Or, connect with me on your favorite social media channel for recipes, photos, & much more:
Pinterest, Facebook, Instagram, YouTube and Twitter!
And find my shop on Amazon for recommendations on cool tools


Leave a Reply