This post may contain affiliate links. If you make a purchase through links on our site, we may earn a commission.
This easy to make Instant Pot Lemon Cheesecake is light and refreshing. It’s creamy, sweet, tart, and absolutely delicious, with a buttery Nilla wafer crust, a smooth and silky cheesecake center, and a tangy sour cream topping; this is a great dessert for any occasion.
And, I’ve included lots of tips for making a great cheesecake. If you’re a cheesecake pro and would like to skip the tips, feel free to use the “jump to recipe” button at the top of the post.
This beautiful cheesecake comes to me from the new cookbook, {affiliate link} “I Love My Instant Pot®” 5-Ingredient Recipe Book. I was provided a copy by the publisher, but all my thoughts are my own.

We appreciate your support
Please let me know if you have any questions about this recipe. I read all the comments myself and I try to help as soon as I can. I have readers from all levels of comfort and experience in the kitchen on my site, and I’ve tried to answer some of your questions already in the post. But if I’ve missed anything, please feel free to leave a comment and ask.
A fantastic cheesecake
Recipes like my Custard Pie and Meyer Lemon Brulee Tart are great for when you want a delicious yet easy to make dessert. I love classic dessert recipes, and this is one of my Dessert Recipes you’ll want in your recipe box!
Have you ever made cheesecake in your pressure cooker? It’s easy to make, and the results are wonderful!
Looking for a great No Bake Lemon Cheesecake, be sure to check out the recipe!

The “I Love My Instant Pot®” 5-Ingredient Recipe Book
This easy to read and use cookbook is for any cook looking to save time, effort, money, and trips to the grocery store. This book features 175 delicious and straightforward recipes that don’t require a lot of prep or shopping, that’ll help you get any meal from breakfast to dinner, and on to dessert onto the table easily.
Best of all, the recipes are flavorful and satisfying ones that the whole family will love and that you’ll want to make over and over again.
In addition to all the fantastic recipes, the book includes a comprehensive yet easy-to-understand overview of how to get the most out of your Instant Pot.
Whether you’ve just bought your Instant Pot or you’ve been using it for years and just need some fresh inspiration, this Official Instant Pot book is for you.

Why make a cheesecake in the Instant Pot?
The IP creates a nice humid environment for the cheesecake to “bake”. The oven is a very dry environment, which creates a crust on the outside of baked goods. And though the crust is normally a good thing, we want the top to stay soft on a cheesecake, so the IP actually makes a better place to make cheesecake.
The pressure cooker also creates even, steady heat. To get that perfectly creamy, velvety cheesecake texture, you want to control the rate of cooking as much as possible, and a pressure cooker creates a nice even cooking environment.
Some tips for a great cheesecake
Make sure the springform pan fits in the IP before you start
Make sure that the springform pan fits inside the pressure cooker insert. You want the pan to sit far enough away from the sides of the IP insert that the steam created can freely rise around the edges of the cheesecake.
In general, these are the sizes of pans that fit inside the sizes of pressure cookers (though some differences may vary by manufacturers):
3-quart pressure cookers typically fit a 5-inch springform pan
6-quart pressure cookers typically fit a 7-inch springform pan
8-quart pressure cookers typically fit an 8-inch springform pan
This recipe is written for using a 7-inch springform pan inside a 6-quart electric Instant Pot pressure cooker.
Use Room Temperature Ingredients
I cannot stress this enough, as this is probably the most important part of the process. Make sure that all your ingredients are at room temperature when you start making this cheesecake. That means pulling all the ingredients out of the fridge before hand, at least 30 minutes, before you plan to make the cheesecake.
Cheesecake that’s made with cold ingredients can be gritty, lumpy, look curdled, or overbeaten.
Don’t over mix
Combine the filling enough to be smooth, but don’t over mix and add air to the cheesecake batter.
Mix using a hand mixer at low speed. This is why it’s so important to use room temperature ingredients that will blend quickly and easily. Never Mix with High Speed; high speed mixing adds too much air to the batter.
If you’re using a stand mixer, use the paddle attachment and mix on a medium-low setting.
Mix in the eggs one at a time at the end to avoid overmixing. It should only take about 15 – 20 seconds per egg with the hand mixer.
Use an instant read thermometer
Use an instant read thermometer to make sure the ingredients are at room temperature. Room temp is between 70° and 75° F.
And use that thermometer again at the end of baking to see if the internal temperature of the cheesecake is done. The cheesecake is ready to come out of the pressure cooker when the middle is between 140° to 150° F.
You can always put your cheesecake back in the pressure cooker and cook it longer. Another nice thing about the IP is that cheesecake that’s cooked in the pressure cooker won’t get dried out crusty edges if you cook it a few minutes longer.
Troubleshooting reasons why the cooking time may vary
There are several reasons why the cooking times may vary: a thicker pan, a silicone trivet vs. a metal trivet, the thickness of the foil that you used to wrap around the springform pan, and/or the pressure cooker model. So don’t fret if your cooking time is a little different.
More tips
Use an offset spatula to carefully smooth the top of the cheesecake so that it’s fairly flat and spread evenly throughout the pan.
Pick up the prepared pan and gently tap the bottom on the counter a few times to bring air bubbles to the surface. Then, pop those air bubbles with a fork.

How do I know when the cheesecake is done?
The cheesecake will be a little jiggly in the center, a bit like Jell-O, and the outer ring of the cheesecake should look slightly puffed. The cheesecake is ready to come out of the pressure cooker when the middle is between 140° to 150° F.
If the cheesecake isn’t cooked completely, you can always put it back in the pressure cooker and cook it longer.
What if it’s over cooked? It may start to crack, or the center may puff up. If this happens, immediately remove the cheesecake from the pressure cooker, and allow it to cool. Cracks may also show up if the cheesecake cooled a little too quickly.
Cracks won’t affect the flavor at all, so don’t worry about them. Besides, you can cover the cheesecake with the sour cream topping and no one will ever see the top!
How do I get the cheesecake out of the IP?
It’s really difficult to reach into the hot IP to grab the cheesecake and not stick your finger into it. So, there are several things you can do.
Make a foil sling.
Use tongs or grabbers.
Use gloves – ovegloves.
You can also just leave the cheesecake in the turned off pressure cooker with the lid open, and let it come down to a temperature where you can reach in and grab the pan.
Serve Chilled or Room Temperature
Cheesecake is meant to be served chilled or at room temperature. It’s after chilling and fully setting that it gains its velvety, silky texture. So serve your cheesecake straight from the fridge, or let it come back up to room temperature before serving.
Make ahead
The flavor and texture of cheesecake is better the day after you bake it, and I love a dessert that can be made ahead.
You can cook the cheesecake up to three days before you plan to serve it. Keep it refrigerated in the springform pan covered with foil until you plan to serve. Wait to add the sour cream topping until serving.
Leftover cheesecake will keep in the fridge for up to five days.
Can I freeze this cheesecake?
Absolutely! And what could be better than knowing you have dessert in the freezer!
Chill the cheesecake thoroughly in the refrigerator as directed in the recipe card. Cut the cheesecake into portions. Wrap it well in plastic wrap, then foil, and freeze for up to 1 month. When you’re ready to eat, thaw a slice or two in the fridge or on the counter.
How to make the cheesecake
There’s a printable recipe card lower in the post.

Place a trivet in the bottom of the IP insert.
You can make a foil sling as shown in the photo above, if desired. It makes it easier to get the cooked cheesecake out.

Make the crust by crushing the cookies and adding the melted butter. Press the crust mixture into the greased or buttered springform pan.

Cream or mix the room temperature ingredients together, then add the eggs, one at a time.
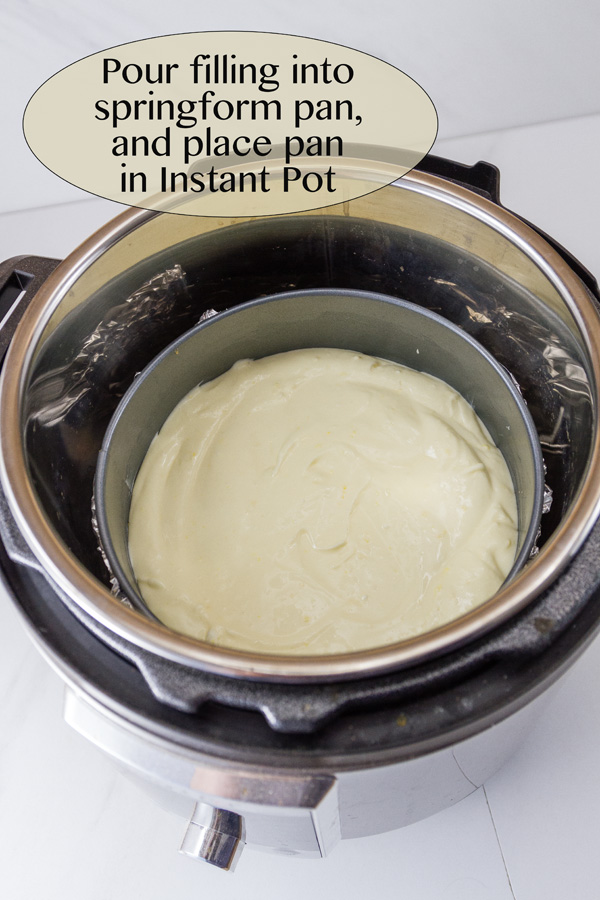
Pour the filling into the springform pan. Tap the cheesecake gently on the counter-top to release the air bubbles. Then pop them with a fork.
Cook the cheesecake in the IP. Allow to cool on the counter, then refrigerate.
Add the sour cream topping, if desired, after the cheesecake has been refrigerated.
Note: I added the sour cream topping to the recipe, it wasn’t originally in the cookbook. But I just love the sour cream topping on cheesecake, so I thought it’s be fun and delicious. Feel free to leave it off if you want, the cheesecake is delicious with or without it!
Kitchen tools you may need
Note: these are affiliate links
The “I Love My Instant Pot®” 5-Ingredient Recipe Book
Offset spatula
6 quart Instant Pot
7-inch springform pan
aluminum foil
Hand mixer
stand mixer
Mixing bowls
Measuring cups and spoons
Instant read thermometer
ove-gloves
tongs
Instant Pot grabbers
Let’s keep in touch
If you like seeing my recipes subscribe via email in the upper right.
Or, connect with me on your favorite social media channel for recipes, photos, & much more:
Pinterest, Facebook, Instagram, YouTube and Twitter!
And find my shop on Amazon for recommendations on cool tools
If you try this recipe,
please come back & leave a comment below letting us know how it goes.
Share a picture & tag @lifecurrents on Instagram.
Or you can upload a “tried it” photo (I would love to see)
via the pin.

Instant Pot Lemon Cheesecake Recipe

Instant Pot Lemon Cheesecake
Equipment
- instant pot
Ingredients
Crust:
- 22 Nilla wafer cookies
- 4 tablespoons unsalted butter melted
Cheesecake filling:
- 14 ounces cream cheese cubed and softened
- ½ cup granulated sugar
- 1/8 teaspoon salt
- Juice and zest of 1 large lemon
- 2 large eggs room temperature
- 1 cup water
Sour cream topping (optional):
- 1 cup sour cream
- 2 & ½ tablespoons powdered sugar
- ½ teaspoon vanilla extract
Instructions
- Grease a 7-inch springform pan and set aside.
Make crust:
- Add vanilla wafers to a food processor and pulse to combine. Add melted butter. Pulse to blend. Transfer crumb mixture to prepared springform pan and press down along the bottom and about 1/3 of the way up the sides of the pan. Place a square of aluminum foil along the outside bottom of the pan and crimp up around the edges (this is to keep the water out and the cheesecake in).
Make filling:
- With a hand mixer on low speed or stand mixer with paddle attachment on medium-low speed, cream together (mix) cream cheese, sugar, salt, lemon juice, and zest. Mix until just smooth. Add eggs, one at a time, mixing until just combined, about 15-20 seconds each. Scrape bowl and gently mix to combine.
- Pour mixture over crust in springform pan. Gently tap the bottom of the pan on the counter to release any air bubbles trapped inside the cheesecake. Pop the bubbles with a form. Smooth the top of the cheesecake with an offset spatula.
- Add water to the Instant Pot and insert the steam rack. Set the springform pan on the steam rack. Lock lid.
- Press the Manual (High) or Pressure Cook button and adjust the time to 30 minutes. When the timer beeps, quick-release pressure until the float valve drops. Unlock the lid.
- Lift the pan out of the pot, and let cool at room temperature 10 minutes. The cheesecake will be a little jiggly in the center. Refrigerate a minimum of two hours or overnight to allow it to set.
Make sour cream topping (if using):
- Place sour cream in a medium sized bowl, stir in the powdered sugar and vanilla, until smooth. Chill until you are ready to serve the cheesecake.
Serving:
- Remove the cheesecake from the refrigerator, and place the cheesecake on a serving plate or cake platter. Remove the foil from the sides of the pan. Gently run a dull blade around the outside of the cheesecake, and release the sides of the pan.
- Spread the top with the sour cream topping, if using.
Nutrition
Nutritional information is based on third-party calculations, and should be considered estimates. Actual nutritional content will vary based on brands used, measuring methods, portion sizes, and more.


Julie
I hadn’t made dessert in my instant pot until I saw this You made it so easy and the cheesecake was delicious!
Kathleen Pope
I love making cheesecake in the Instant Pot and this lemon tastes incredible, plus I love that you added the sour cream topping, my mom always added that on hers too! The whole thing is perfect!
Madi
Making a cheesecake in an Instant Pot?! What an awesome idea! So I tried it today and it’s so delicious! Easy to make with all your tips too.
MICHAELA KENKEL
I loved this recipe!! I would have never thought I could make a cheesecake this luscious in a pressure cooker!? It was perfect!