This post may contain affiliate links. If you make a purchase through links on our site, we may earn a commission.
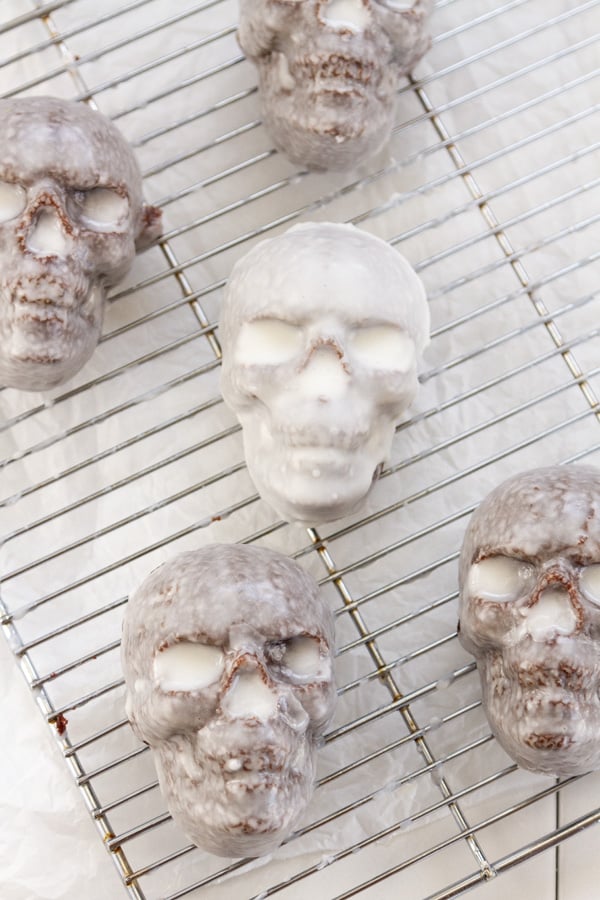
Chocolate Skull Cakes with a rich and decadent dark chocolate cake, a hint of cinnamon, and a kick of spice are topped with a simple glaze for a spooky and festive Dia de los Muertos (Day of the Dead) or Halloween dessert.
The combination of the moist cake with the sweet icing will haunt and delight your guests. You can even use this recipe to make simple Halloween cupcakes or serve the skull cakes at a pirate themed party.
And, these cakes are actually really easy to make!
For another fun edible skull, check out my Mozzarella Cheese Skulls and these Skull Egg Bites. They’re easy to make and so spooky!

We appreciate your support
Please let me know if you have any questions about this recipe. I read all the comments myself and I try to help as soon as I can. I have readers from all levels of comfort and experience in the kitchen on my site, and I’ve tried to answer some of your questions already in the post. But if I’ve missed anything, please feel free to leave a comment and ask.
Chocolate cake recipe
I took my favorite dark chocolate cake recipe and turned it into this nicely spiced cake with some Mexican flavors.
The cake itself is moist and delicious, with a tender crumb! And, it’s vegan. The trick to a super moist cake is vinegar. It’s richly chocolate without being overly sweet.
You make the cake in one bowl!
It uses cocoa powder, not chocolate, so there’s no messy melting of chocolate. And I highly recommend dark cocoa powder for most of my recipes.
The flavors of cinnamon and chipotle make this a bit more of an adult cake. If you want to make it more kid-friendly, go ahead and leave the spices out.
I’m sure that once you try it, this cake will be your standard chocolate cake recipe from now on!

How to make a skull cake
The cake recipe can make 12 skulls. You’ll need to have two skull pans, or wait a few minutes for the pan to cool before pouring in the batter for the second batch. Or, you can make 6 skulls with some cupcakes or small loaf on the side. Your choice.

I have a list of tools you may need lower in the post in case you need a skull pan (and I think everyone needs a skull pan!).
These skulls are large enough that 2 people will probably want to split one. So, I consider this 24 servings of cake.
The full printable recipe ingredients and instructions are available in the recipe card at the bottom of the post. You can find important tips and tricks in the post.
Make the cake

Preheat oven to 350° F. Spray the skull cake pans with non-stick spray. Set aside.
In large mixing bowl combine dry cake ingredients, and mix well.
Add wet cake ingredients to the dry ingredients.
Beat with electric mixer on medium to high speed or a sturdy fork until well combined.
Fill the molds & bake
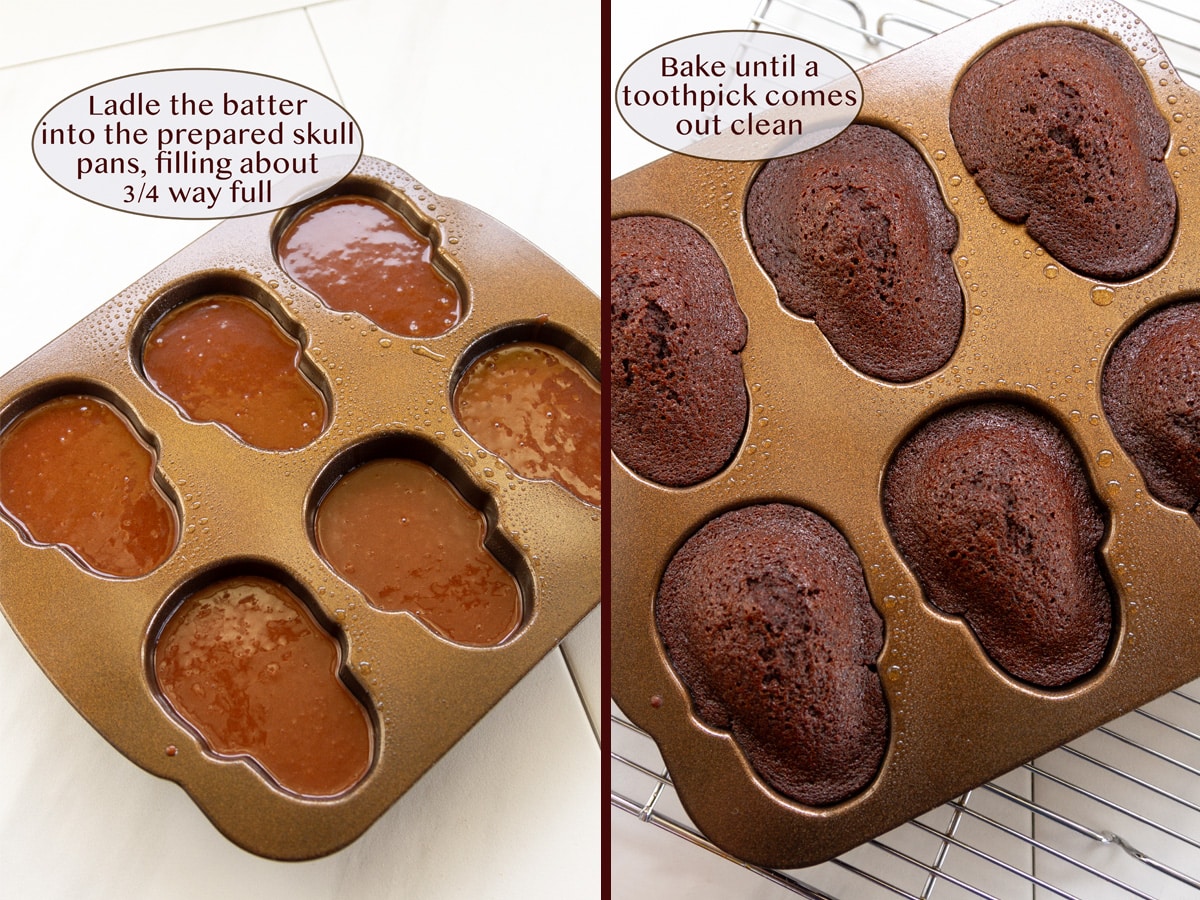
Ladle cake batter into the prepared skull pans, filling them about ¾ full. Don’t overfill the molds.
If you have leftover batter, you can make cupcakes, small loaf cakes, or additional skulls after the first batch has baked.
Bake about 20-30 minutes or until a toothpick inserted near center comes out clean or until they spring back when pressed gently with a finger.
Carefully remove the pans from the oven and place on a cooling rack. Cool the skull cakes in the pans for about 10 minutes.
Remove the skulls
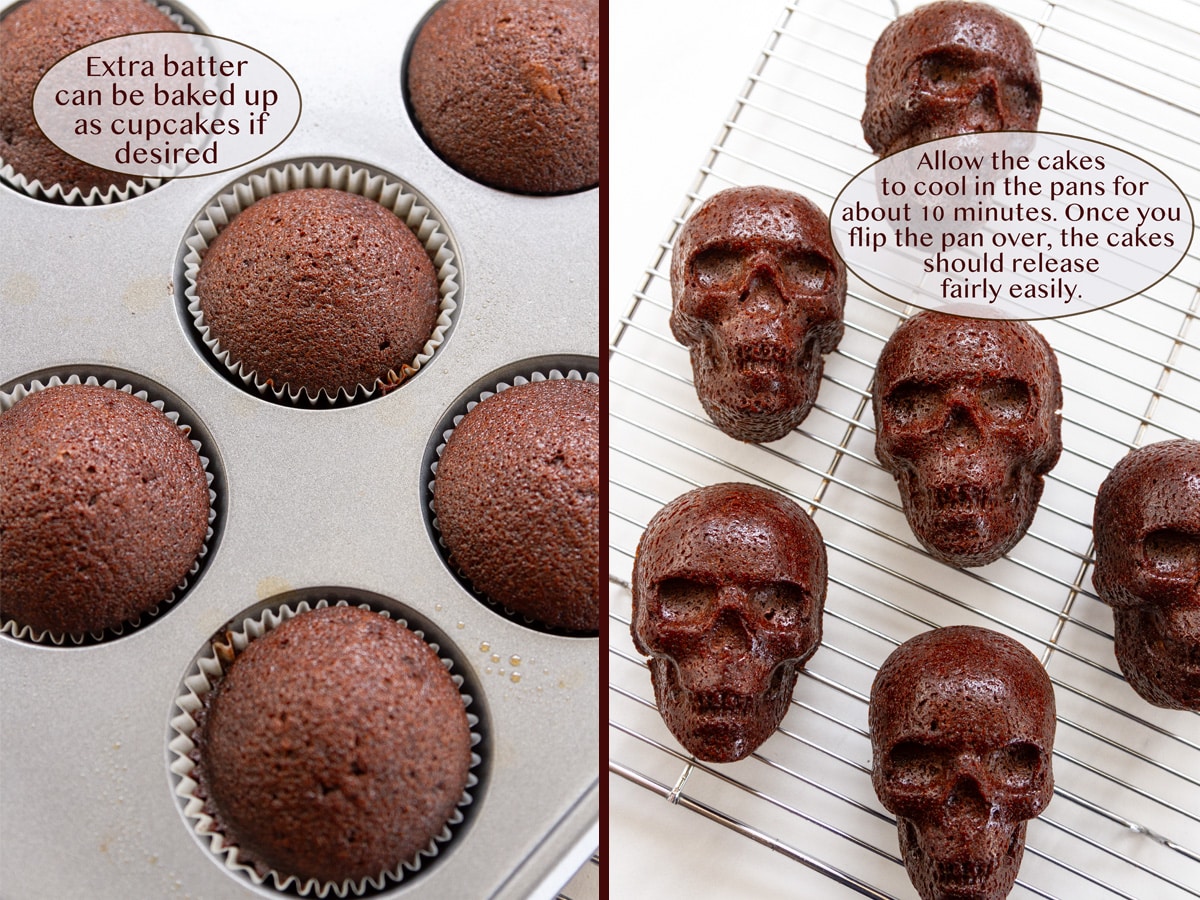
To remove the skulls from the pan, gently pull the cake away from the insides of the pan using your fingers. Then, turn the skull pan upside down on top of a cooling rack. The skulls should pop out after a few seconds. Leave them on the cooling rack to cool completely before glazing and decorating.
The backs of the skulls will have a bit of a mound from the cake. The mound actually serves to sit them up at a nice angle, so you can see the face. But, if you prefer, you can cut the mound off. Don’t cut too much, or the skull will lose structural stability.

Make the icing
Once the cakes are completely cool, set up the glazing station. Place large piece of parchment paper or aluminum foil on the counter. Place a wire rack on top of the parchment paper. This is to catch any glaze that drips off the skulls.
Make the glaze: mix the powdered sugar, water, and cream together in a medium bowl, one deep enough to accommodate the skull face.
Pro tip: depending on how you scoop the powdered sugar when you measure it, the icing may be thicker or thinner. Use one skull or cupcake to do a test tip to see how you like the consistency of the icing.
Thicker icing will coat more, and require fewer dips. Thinner icing will be easier to work with, as it won’t grab a hold of the skull when you dip it. But you may want to dip the skull two of three times to get a more solid coat.
If you want to thin the icing a bit, add a little more water or cream, only about a half teaspoon at a time, mixing in completely before adding more so you can see the texture.
glaze the skulls


Dip the skull, face first, into the icing, rolling the face around to get it all coated.
Hold the dipped skull over the bowl for a few seconds to let the excess icing drip off.
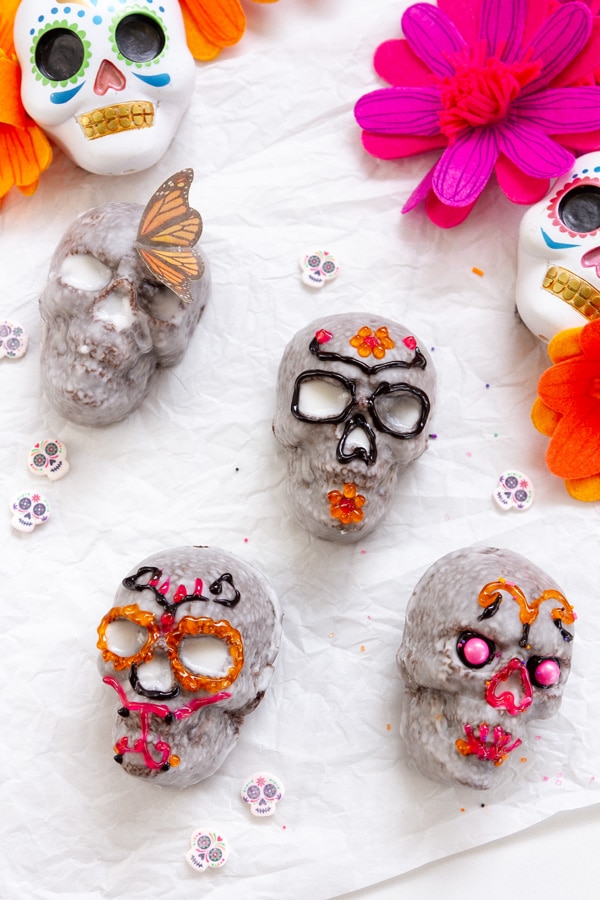
Set the iced skull cake face up on the glazing station rack. Repeat with the remaining skull cakes and cupcakes. Allow the icing to set up before decorating.
Refrigerate any leftover cakes in airtight containers for up to 5 days. The icing will shrivel a bit the longer they are in the fridge.
Yes, these are great made ahead, making them perfect for Halloween, Day of the Dead, and pirate parties.
There are two options for making them ahead. Make the cakes and refrigerate them until ready to ice them. Or, make and ice them and store them.
You could also make the cakes and have your guests ice and decorate them at the party.

Kitchen items you may need
Note: these are affiliate links
Dia De Los Muertos Sprinkle Mix
Let’s keep in touch
If you like seeing my recipes subscribe via email in the upper right.
Or, connect with me on your favorite social media channel for recipes, photos, & much more:
Pinterest, Facebook, Instagram, YouTube and Twitter!
And find my shop on Amazon for recommendations on cool tools
If you try this recipe,
please come back & leave a comment below letting us know how it goes.
Share a picture & tag @lifecurrents on Instagram.
Or you can upload a “tried it” photo (I would love to see)
via the pin.

Recipe

Skull Cakes
Equipment
Ingredients
For the cake:
- Non stick Spray oil for the pans
- 3 cups all-purpose flour
- 1 cup granulated sugar
- 1 cup dark brown sugar
- ½ cup special dark unsweetened cocoa powder
- 2 teaspoon baking soda
- 1 & ½ teaspoons cinnamon
- 1 teaspoon salt
- ½ teaspoon chipotle powder or ground cayenne pepper
- 2 cups cold water
- 2/3 cup vegetable oil
- 2 teaspoon white vinegar
- 1 teaspoon vanilla
For the glaze:
- 4 cups powdered sugar
- ¼ cup water
- 2 tablespoons heavy cream
Instructions
- Preheat oven to 350° F. Spray the skull cake pans with non-stick spray. Set aside.Non stick Spray oil for the pans
- In large mixing bowl combine dry cake ingredients, and mix well.3 cups all-purpose flour, 1 cup granulated sugar, 1 cup dark brown sugar, ½ cup special dark unsweetened cocoa powder, 2 teaspoon baking soda, 1 & ½ teaspoons cinnamon, 1 teaspoon salt, ½ teaspoon chipotle powder
- Add wet cake ingredients to the dry ingredients.2 cups cold water, 2/3 cup vegetable oil, 2 teaspoon white vinegar, 1 teaspoon vanilla
- Beat with electric mixer on medium to high speed or a sturdy fork until well combined.
- Ladle cake batter into the prepared skull pans, filling them about ¾ full. If you have leftover batter, you can make cupcakes, small loaf cakes, or additional skulls after the first batch has baked.
- Bake 20-30 minutes or until a toothpick inserted near center comes out clean or until they spring back when pressed gently with a finger.
- Carefully remove the pans from the oven and place on a cooling rack. Cool the skull cakes in the pans for about 10 minutes.
- Mix the powdered sugar, water, and cream together in a medium bowl, one deep enough to accommodate the skull face.4 cups powdered sugar, ¼ cup water, 2 tablespoons heavy cream
- Once the cakes are completely cool, set up the glazing station. Place large piece of parchment paper or paper towels on the counter. Place a wire rack on top of the parchment paper. This is to catch any glaze that drips off the skulls.
- Dip the skull, face first, into the icing, rolling the face around to get it all coated.
- Hold the dipped skull over the bowl for a few seconds to let the excess icing drip off.
- Set the iced skull cake face up on the glazing station rack. Repeat with the remaining skull cakes and cupcakes. Allow the icing to set up before decorating.
Notes
Nutrition
Nutritional information is based on third-party calculations, and should be considered estimates. Actual nutritional content will vary based on brands used, measuring methods, portion sizes, and more.


Leave a Reply