This post may contain affiliate links. If you make a purchase through links on our site, we may earn a commission.
How to roast peppers is part of my cooking basics series to help you build a good foundation for how to cook things at home. Just the simple techniques to getting great roasted peppers, and some recipes to use those roasted peppers in.

We appreciate your support
Please let me know if you have any questions about this recipe. I read all the comments myself and I try to help as soon as I can. I have readers from all levels of comfort and experience in the kitchen on my site, and I’ve tried to answer some of your questions already in the post. But if I’ve missed anything, please feel free to leave a comment and ask.
cooking basics
I’m going to be doing a new series of “Cooking Basics” or building blocks to great cooking. I thought I’d start this series because people ask me about various techniques and terms.
The questions range from what to eat for dinner tonight, to what something means, or how to do something, or exactly what this other thing is.
Whatever the question, I try my best to explain, but sometimes pictures and detailed instructions are the best explanation. I’ll try to include options and various cooking gadgets to cover all the different basics.
Of course, the best way to learn is to do it.
So, please be sure to try out new techniques and new ideas. And, let me know if you find something new that you like. I’m always trying to learn new stuff as well.
Also, a friend of mine was asking for me to teach a cooking class. I think I might have to do that – it sounds like fun. So, maybe after the beginning of the year I’ll have to schedule a class or a cooking club, and we can get together and cook.
So, for the first installment of Cooking Basics, I’m presenting…
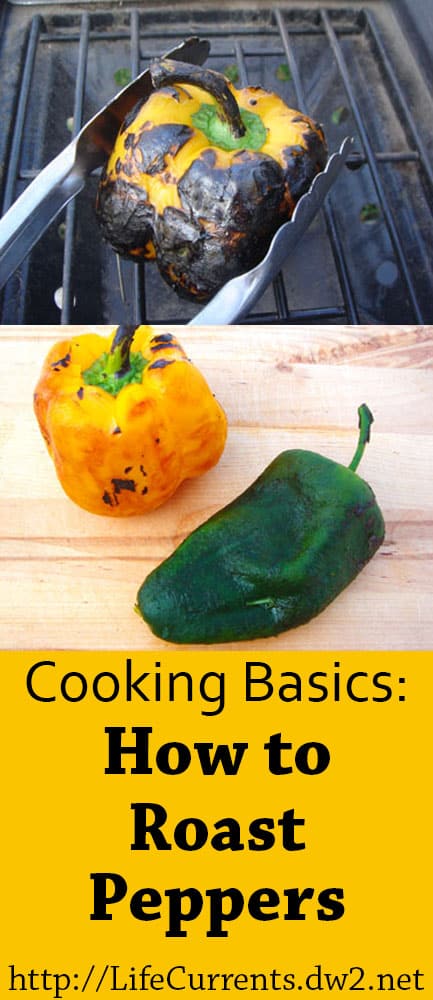
How to Roast Peppers
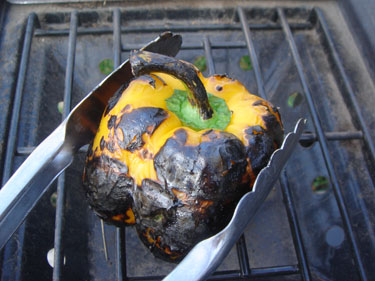
Gas grill or stove
Place the pepper directly on the grate of a gas burner.
The grill is my favorite place to roast the pepper because it keeps the smells outside, but the stove-top works just as well.
Allow the skin of the pepper to blacken and char.
Using tongs, turn the pepper over so that it has a chance to blacken on each side. The top will be difficult to char due to the stem, just try to get it as black as possible without catching the stem on fire.
blackening the pepper skin
What you’re doing by blackening the pepper is burning the skin off. The skin is tough and not really tasty anyway, so the blacker you get the pepper, the more skin you’re getting off, the better the pepper will taste.

broiler
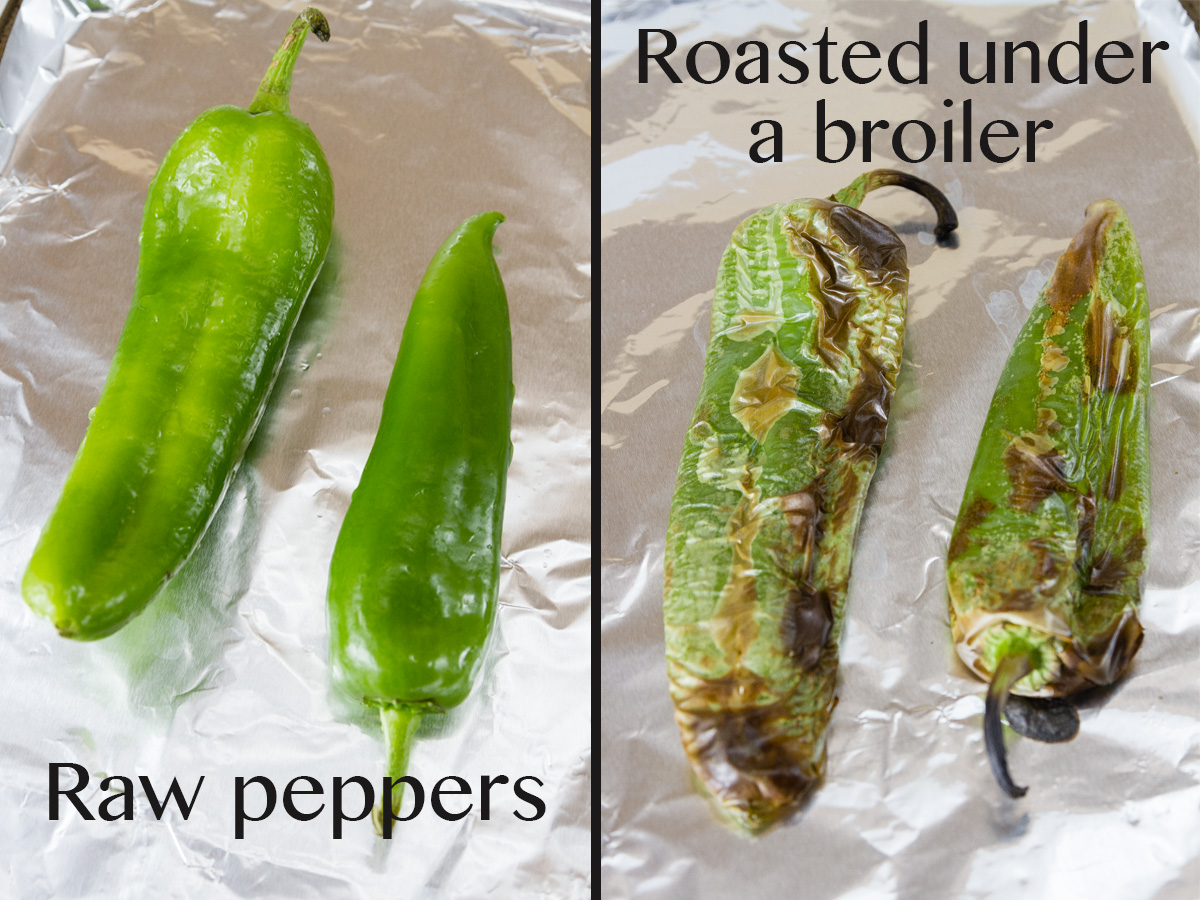
If you don’t have a gas stove, you can place the pepper on an aluminum foil lined baking sheet under the broiler.
Use the hottest setting you can on the broiler, usually 450 to 500 degrees F.
Broil the peppers until the skin is charred and blistered but not ash white, turning often, about 5 to 10 minutes.

steam them
Place the thoroughly blackened pepper in a bowl and cover with plastic wrap (this is the method I prefer – I think there’s a better final product, and there’s less trash at the end).
Or, place the pepper in a plastic ziptop bag, and seal the bag.
Or, place the pepper in a brown paper sack and fold the top down to keep the heat in the bag.
Allow the pepper to steam for about 10 minutes.
This step helps to soften the flesh of the pepper, and helps to loosen the skin. It also helps to cool the pepper down so that you can easily touch it.
peel the pepper
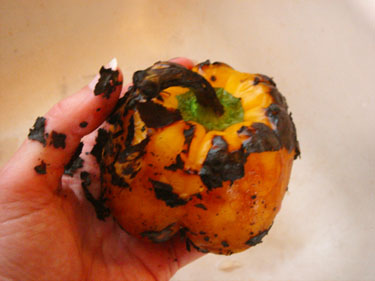
This is the messiest step!
For this next step, you may wish to wear gloves, especially if you’re sensitive to chilies, or if you’re working with a lot of chilies, as the capsicum may burn your skin and leave you feeling tingly.
Take the pepper out of the bowl (or bag), and rub the skin with your fingers to get the blackened peel off of the pepper.
You can run the pepper under running tap water to help move the blackened peel away.
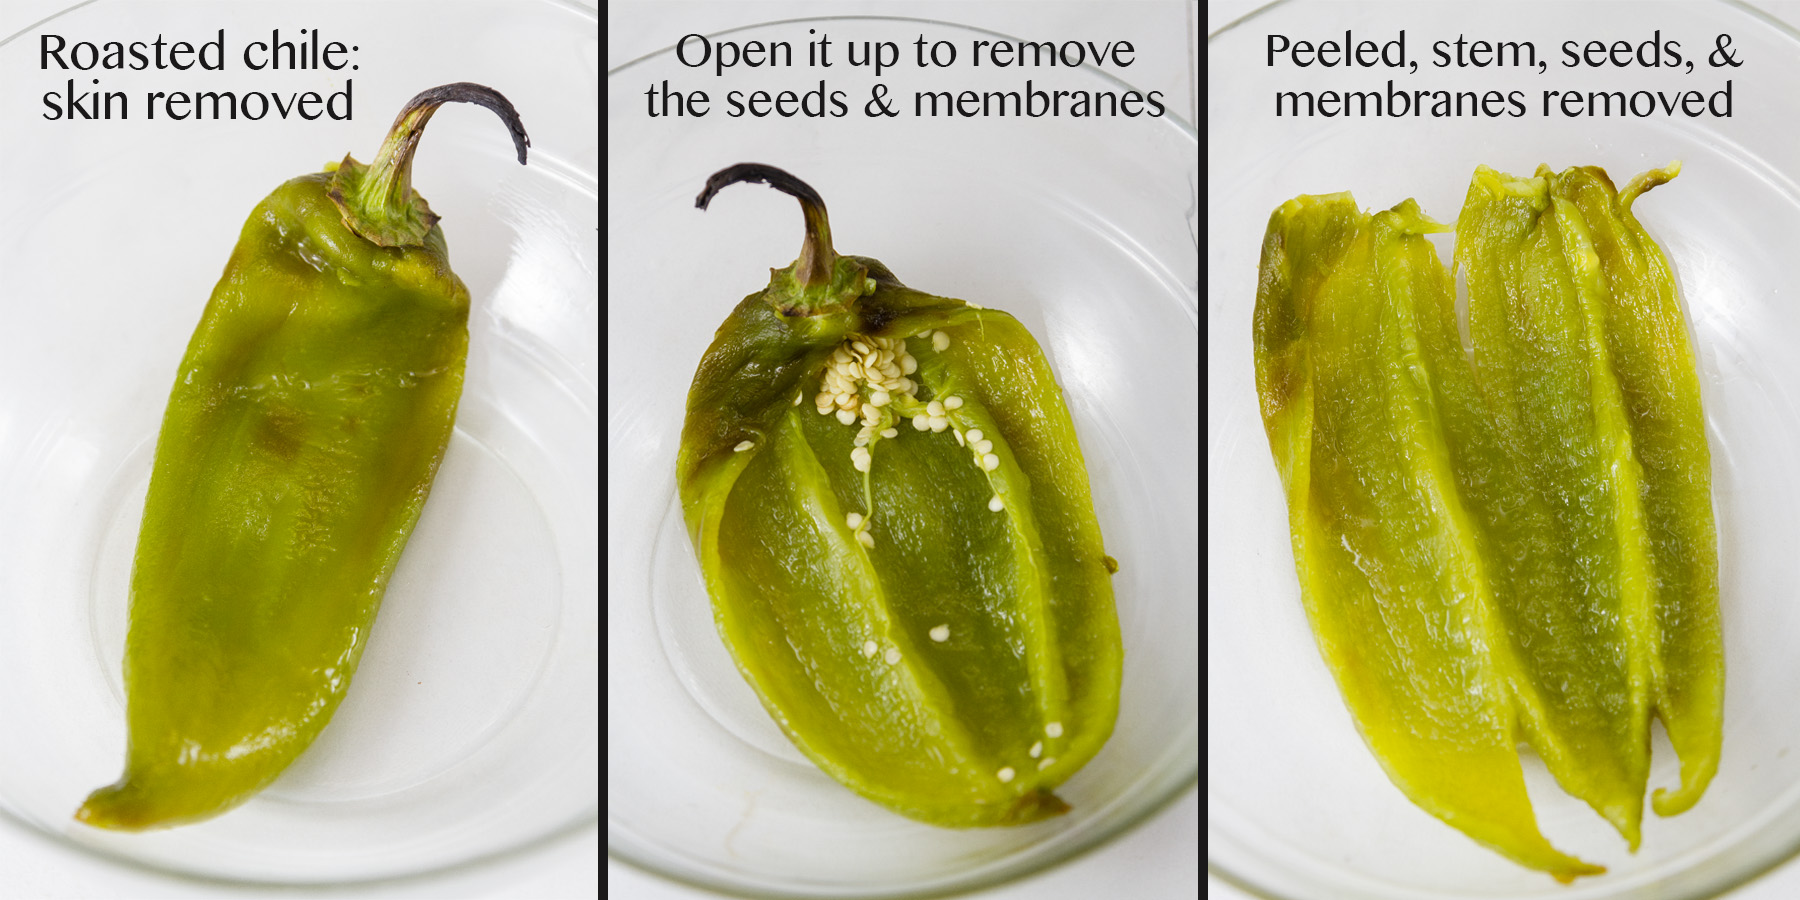
cut the pepper

Using a sharp knife, cut the flesh of the pepper away from the stem.
Remove the seeds and the membranes inside. The membranes and the seeds are where the majority if the heat is located if you’re using spicy chile peppers.
If you wish to leave a little extra heat in your chile, you may leave a little more of the membrane and seeds.

serving suggestions
At this point, your roasted pepper is ready to be cut to the size you want, and to be eaten.
I love adding the roasted chilies to tacos. Just cut them into long strips and toss into tortillas with the rest of your fillings.
They are perfect for fajitas.
You can use your roasted chilies in Mexican Roasted Poblano and Corn Soup, to Roasted Chile Tostadas, or to Creamy Sheet Pan Poblano Tacos.
Roasted red peppers are great in lasagna. Check out my Red Pepper Fresh Mozzarella Lasagna or my Red pepper lasagna (no tomatoes).
Stews benefit from roasted peppers. Check out my Red pepper and white bean stew. Even if the recipe doesn’t call for them, I add some in all the time.
Soups are another place that I like to add roasted peppers to. Check out my Roasted Red Pepper Soup. You can add them to Minestone or Tomato Shrimp Soup.
Let’s keep in touch
If you like seeing my recipes subscribe via email in the upper right.
Or, connect with me on your favorite social media channel for recipes, photos, & much more:
Pinterest, Facebook, Instagram, YouTube and Twitter!
And find my shop on Amazon for recommendations on cool tools
If you try this recipe,
please come back & leave a comment below letting us know how it goes.
Share a picture & tag @lifecurrents on Instagram.
Or you can upload a “tried it” photo (I would love to see)
via the pin.


Leave a Reply