This post may contain affiliate links. If you make a purchase through links on our site, we may earn a commission.
Homemade Coffee Ice Cream Drumsticks

We appreciate your support
Please let me know if you have any questions about this recipe. I read all the comments myself and I try to help as soon as I can. I have readers from all levels of comfort and experience in the kitchen on my site, and I’ve tried to answer some of your questions already in the post. But if I’ve missed anything, please feel free to leave a comment and ask.
Childhood favorites
A while ago I decided that I wanted to remake some of the foods from our childhood. I wanted the new versions to reflect out current eating styles: healthier, less fat, no trans-fats, fewer processed items, more veggies, maybe even just tastier.
Some of those childhood recipes include Little meat patties and rice, Italian Apricot Chicken and the vegetarian Italian Apricot Stew, Rice-a-Roni, and Spaghetti-os.

So, I set out to gather up some of the things that Dan and I enjoyed as kids. Some of them were dishes that our mothers made. Some were purchased foods. For example, Dan loves novelty ice cream.
You know, ice cream sandwiches and drumsticks and such. The kinds of things you may have purchased from the ice cream man in the summer as a kid.
Well, the other day he had a hankering for some drumsticks. They didn’t last long in the house. But, while they were around I happened to pick up the package and look at the labeling. And, to my dismay, they had trans-fats in them. Partially hydrogenated oils. BOOO!

So, I decided that I would make my own drumsticks. And, after Dan and I went running, I asked him what flavor ice cream he wanted in a homemade drumstick (Yes, I think about food when I exercise). After a little thinking, he said he wanted coffee ice cream. Smooth and creamy.
And, we both agree that a drumstick should have a smooth ice cream inside. At least for the first attempt at a drumstick! Maybe I could see a cookies and cream ice cream inside. But, the idea of a little bit of grown-up flavor inside a childhood favorite appealed to both of us.
Now, I did decided to purchase the cones. But, be careful, I had to read several packages to find one without trans fats. You could also make the cones if you’re so inclined.

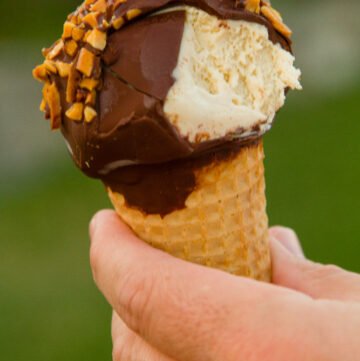
So, here’s the first in my eventual remaking of our childhood foods… I bring you, the Homemade Coffee Ice Cream Drumstick!
And, they’re really pretty easy. The only difficult part is waiting on each step to cool. I made 6 drumsticks out of the recipes below, and I had a little leftover ice cream, and a bit of leftover chocolate shell.
How much leftover you have will depend on how big you make your drumsticks. But, the chocolate keeps well in the fridge, just microwave it for a few seconds to melt it again, and serve it over any other ice cream.

The cones and glasses have been set up in my workspace. I used these double old-fashioned glasses. Mugs would work will too.

Swirling the chocolate inside the cone. Rotate the cone around to get good coverage.

The inside of the cone has been coated with chocolate and the ice cream has been scooped inside. Now, back in the freezer with you!

Looking down into my freezer (I have a pull out drawer on the bottom type freezer), you can see the cones have been coated with chocolate. This first batch I double dipped the ice cream. It didn’t work as well as a single dip… the chocolate shell was too thick and hard to bite into.

You can see this batch in the photo above was double coated with chocolate & when you bit into them, the two layers separated. So, I highly encourage you to do a single dip only. They were way easier to eat and really super yummy!

Homemade Coffee Ice Cream Recipe
Coffee ice cream drumsticks
Ingredients
Coffee ice cream
- ¾ cup sugar
- 3 large egg yolks
- 2 teaspoons all-purpose flour
- ¼ teaspoon salt
- 1 ½ cups milk
- ¾ cup whole coffee beans
- 1 ½ cups heavy cream
- ½ teaspoon vanilla extract
chocolate shell
- 8 ounces good quality chocolate chopped
- ¼ cup coconut oil melted
drumsticks
- 6 Sugar Cones
- Chocolate Shell at room temperature
- Coffee Ice Cream
- 1/3 cup Toasted* Almonds chopped
Instructions
Coffee ice cream:
- In a medium mixing bowl, beat the sugar into the egg yolks until they’re thickened and pale yellow. Beat in the flour and salt. Set aside.
- Combine the milk and coffee beans in a heavy medium saucepan. Bring to a boil over medium heat. Lower the heat, cover, and keep warm for 20 minutes.
- Remove the coffee beans with a skimmer or slotted spoon, or pour milk through a strainer catching the coffee milk on the other end. Slowly beat the warm milk into the eggs and sugar. Pour the entire mixture back into the pan and place over low heat. Stir constantly with a whisk or wooden spoon until the custard thickens and coats the back of a wooden spoon. Be careful not to let the mixture boil, or the eggs will scramble. Remove from heat, and pour the hot coffee custard through a strainer into a large, clean bowl. Allow the custard to cool slightly, and stir in the cream and vanilla. Cover and refrigerate until cold or overnight.
- Stir the chilled custard, and freeze in your ice cream machine, according to manufacturer’s instructions. When finished, the ice cream will be soft, but ready to eat. For firmer ice cream, transfer to a freezer safe container and freeze at least 2 hours.
Chocolate shell
- Combine chocolate and coconut oil in a small wide-mouthed bowl and microwave for 30 seconds to 1 minute, (microwave power will vary). Remove from microwave and stir. Mixture should be smooth and melted; if it’s not, return to microwave for another fifteen seconds. Set aside and allow to cool to room temperature.
Drumsticks:
- Place 6 small glasses or mugs on the workspace and stand the sugar cones up in the glasses. Clear a space in your fridge and freezer to store the cones in 6 glasses.
- Drizzle ½ tablespoon chocolate shell into a sugar cone, and swirl the chocolate to coat the inside of the cone. Place the coated cone in a glass, and into the fridge to harden the chocolate shell, checking on the shell in 5 minutes, and swirl to coat again. Leave coated cone in the fridge until the chocolate has hardened. Repeat with all 6 cones.
- Once the chocolate has hardened in the cone, take the ice cream out of the freezer and allow it to soften on the counter for about 5 minutes.
- Working quickly with one cone at a time, take a cone out of the fridge and spoon about 2 tablespoons softened ice cream into the cone (using more or less as the cone volume may differ), pressing the ice cream down into the cone. Using an ice cream scoop, crown the top of the filled cone with a scoop of ice cream. Gently press down on the scoop of ice cream to create a solid ice cream filling. Immediately place the cone in the glass and place it in the freezer to harden, this should take about 30 minutes to 1 hour. Repeat with all 6 cones.
- Place the chopped toasted almonds on a shallow plate or tray and place it in the work area. Make sure your chocolate shell is at room temperature and in a wide-mouthed bowl.
- Working quickly with one cone at a time, take a glass with a cone out of the freezer and dip the ice cream into the chocolate shell attempting to coat the entire outside of the ice cream. Allow any excess chocolate to run off of the ice cream and immediately roll the soft chocolate in the chopped nuts. Place the drumstick back in the glass and back into the freezer to harden again, about 20 minutes. Repeat procedure with all 6 cones.
You have just made awesome homemade drumsticks that your family will love
Notes
Nutrition
Nutritional information is based on third-party calculations, and should be considered estimates. Actual nutritional content will vary based on brands used, measuring methods, portion sizes, and more.


Patty Haxton Anderson
I am sure all the time involved was worth it. These sound fabulous.
April J Harris (@apriljharris)
Oh these look delicious, Debi! Your Homemade Coffee Ice Cream Drumsticks really bring back memories and I love how wholesome the recipe is – it’s especially good to know you can make the chocolate shell sauce from scratch!
homemadefoodjunkie
I am so happy to find this recipe! I will try that dipping process. I have never dipped cones at home and love the coconut oil and chocolate idea. pinning!