This post may contain affiliate links. If you make a purchase through links on our site, we may earn a commission.
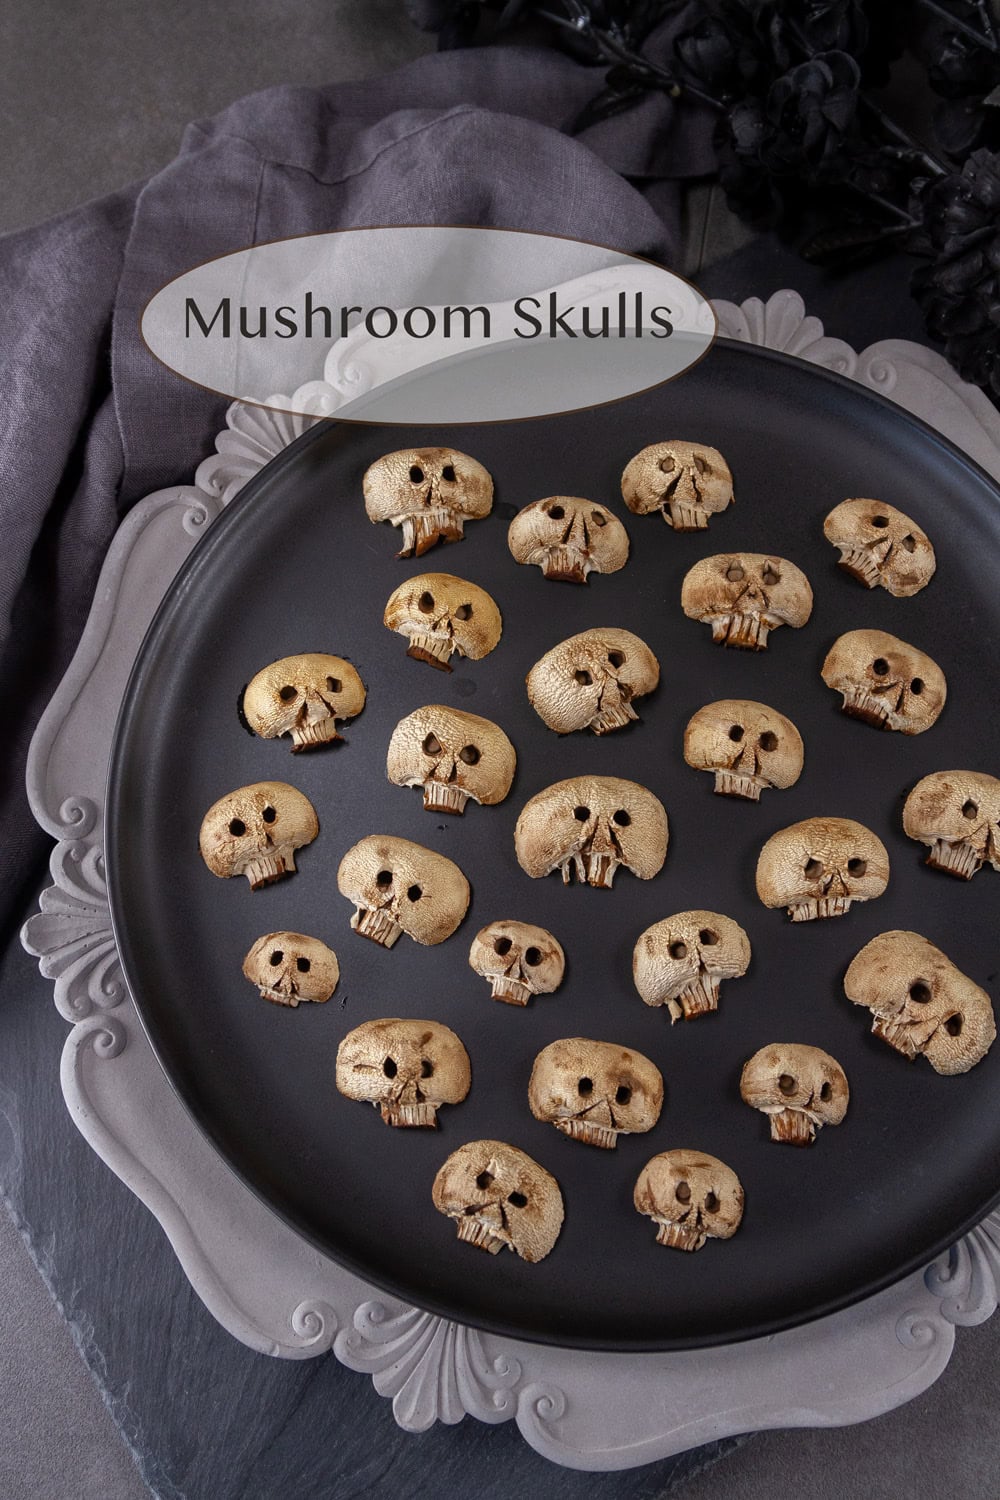
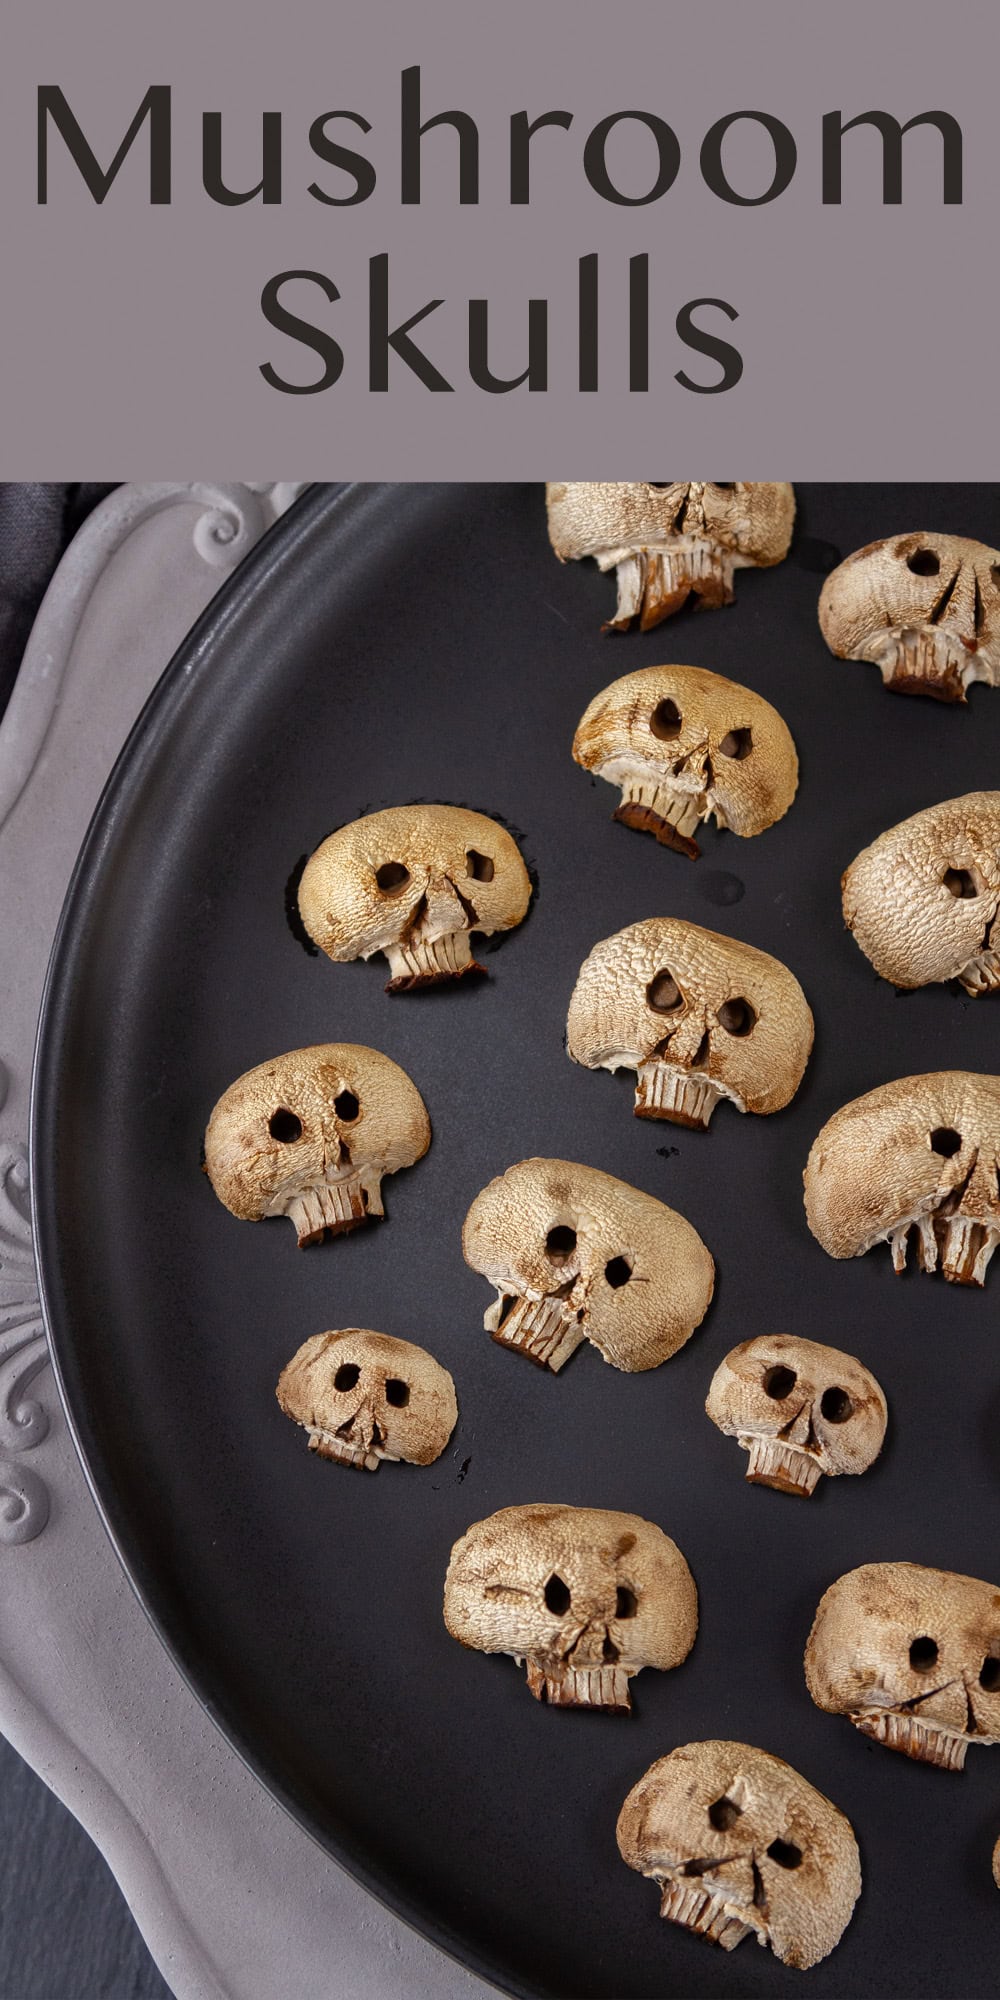
Mushroom Skulls for Halloween are easily carved out of white button mushrooms, and look like tiny spooky skulls. They’re the perfect edible decoration for all your Halloween dishes.
Halloween has long been my favorite holiday. That’s why I’m so excited by all of these fun and creative Halloween recipes! Make sure you check out my Pizza Skulls more skull fun, and my Halloween archives for more creepy recipes!
We appreciate you
Please let me know if you have any questions about this recipe. I read all the comments myself and I try to help as soon as I can. I have readers from all levels of comfort and experience in the kitchen on my site, and I’ve tried to answer some of your questions already in the post. But if I’ve missed anything, please feel free to leave a comment and ask.
Let’s get started!
These are super easy to make, and you can even play around with them to make different faces and effects. All you need are mushrooms, a straw, and a sharp knife. Then they go into the oven for a few minutes to dry them out a bit so they get shriveled and wrinkly.
What kind of mushrooms?
If you want white skulls, you’ll want to get white button mushrooms. Any size will work, though if they’re super tiny, you may have a hard time carving them.
I also played around with brown mushrooms, and they worked great too. Maybe with a more shrunken head kind of outcome. Which tells me that if you wanted to use Baby Bella Mushrooms or even much bigger portobello mushrooms, they would work.
Carving
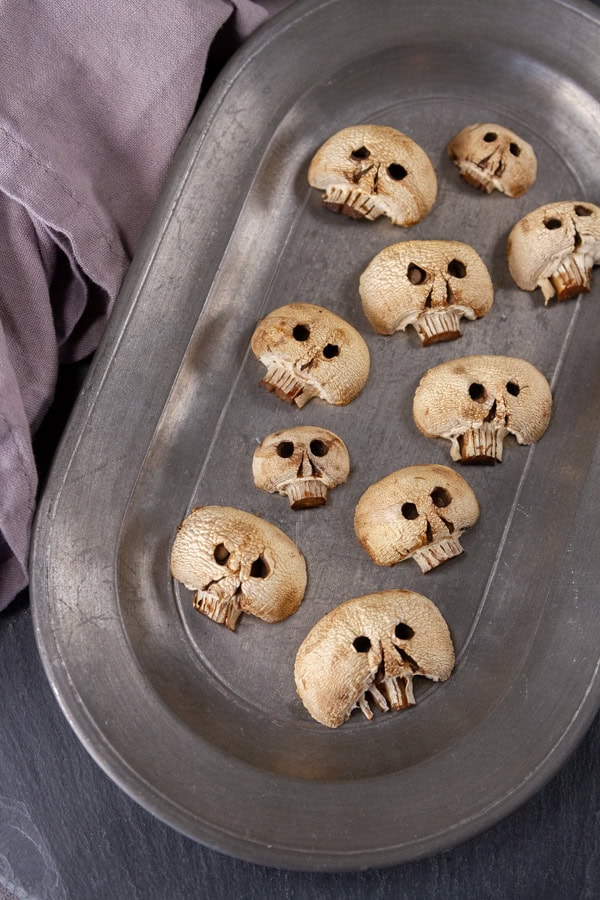
Clean any dirt from the mushrooms, and slice them in half.
Trim the stem end of the mushroom so that it’s straight and flat.
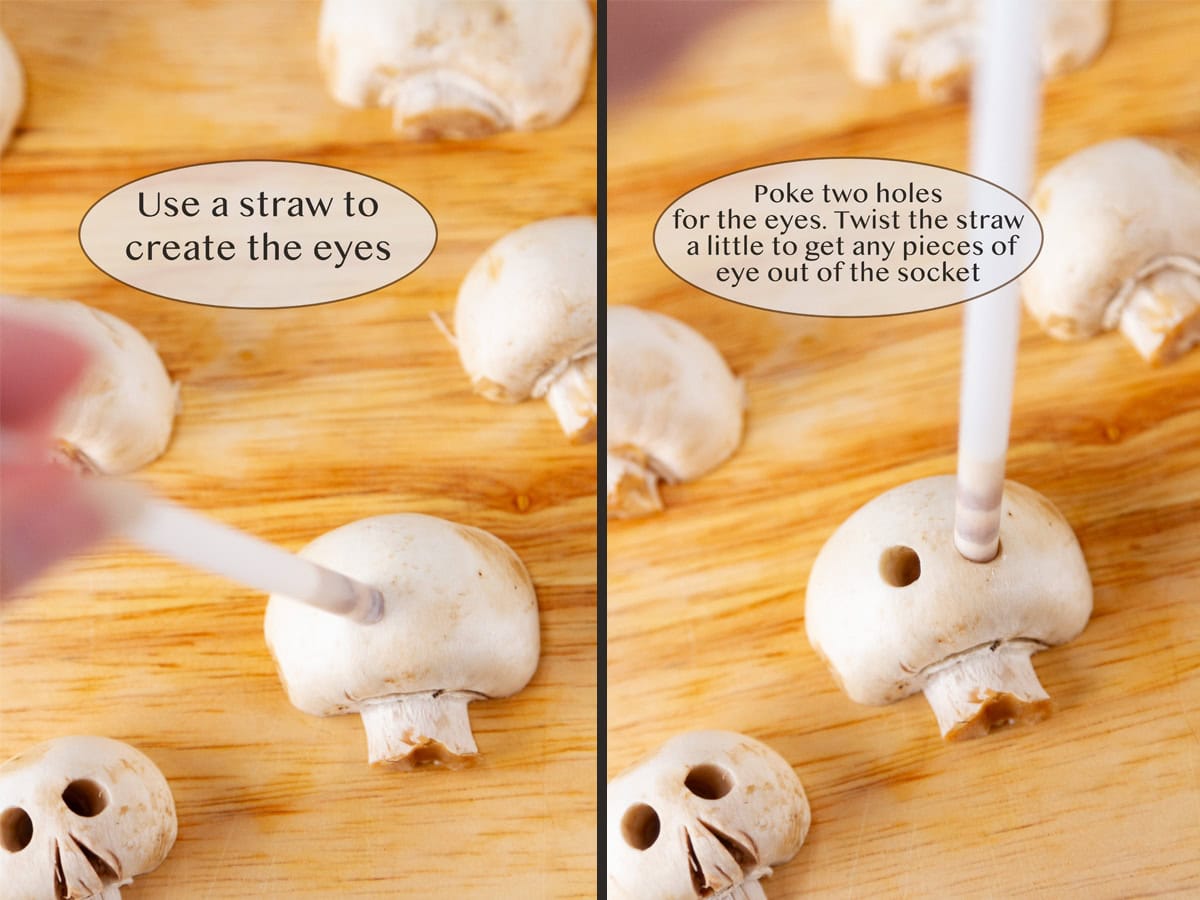
Use a plastic or metal straw (don’t use paper) to poke two eyes into the mushroom. The straw can be any size, it doesn’t matter, you’ll just end up with bigger or smaller eye sockets. Use a boba straw for really big eyes. Remove any pieces of mushroom left in the eye socket. I found they came out easily by twisting the straw a little after you’ve inserted it.

Use a small knife to cut two small slits for the nose. Remove any pieces of mushroom left in the nose slits. You can also make a triangle in the middle for the nose, which ends up looking a little like a jack-o-lantern.
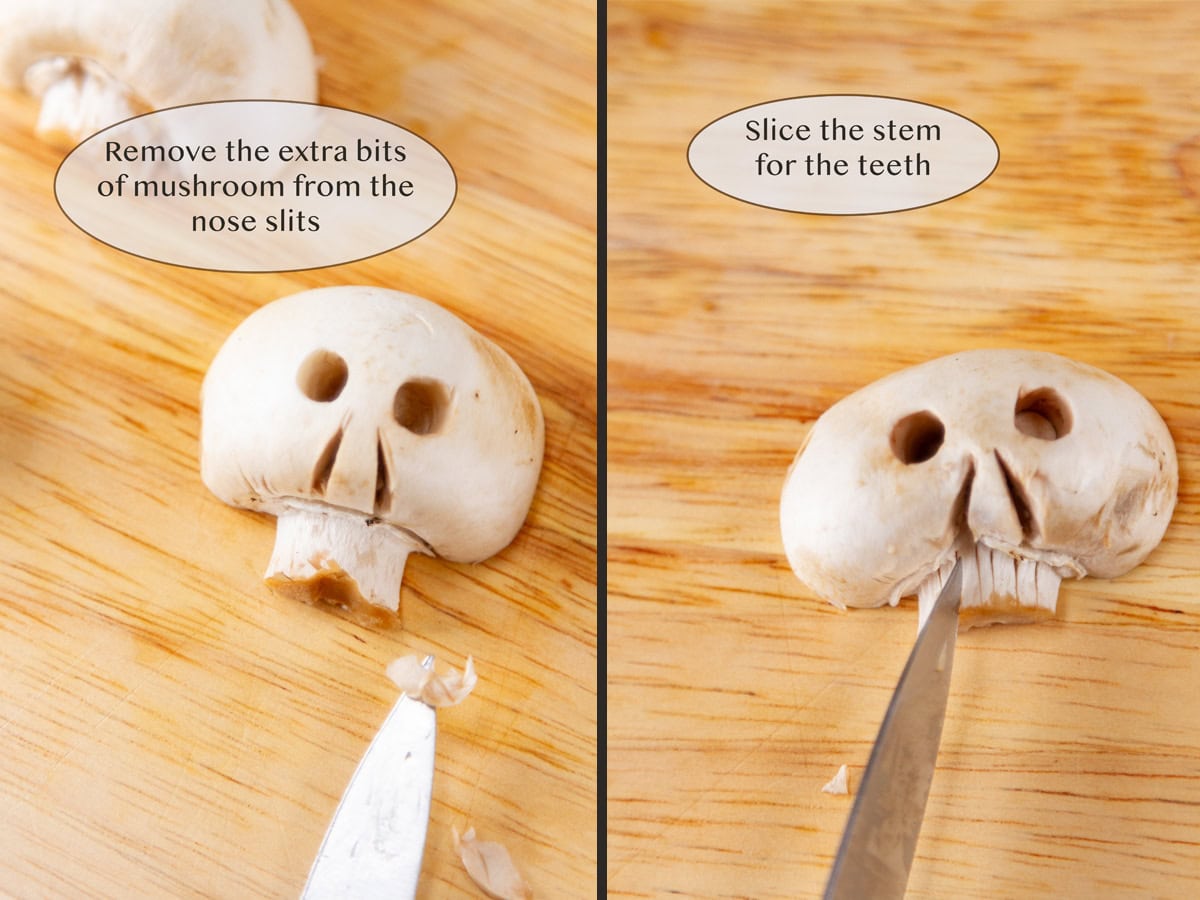
Cut a few lines down the stem of the mushroom to make the teeth.
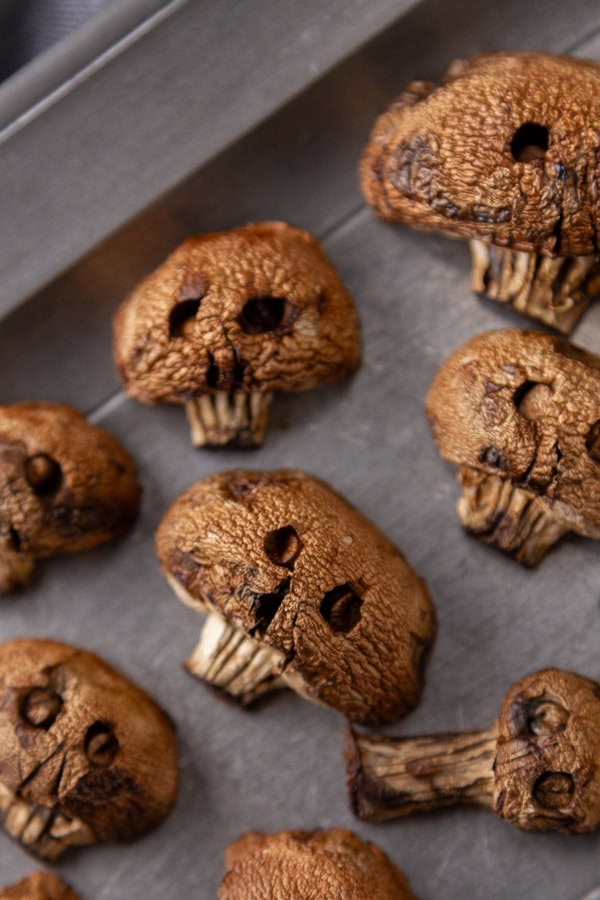
Preheat the oven to 375° F.
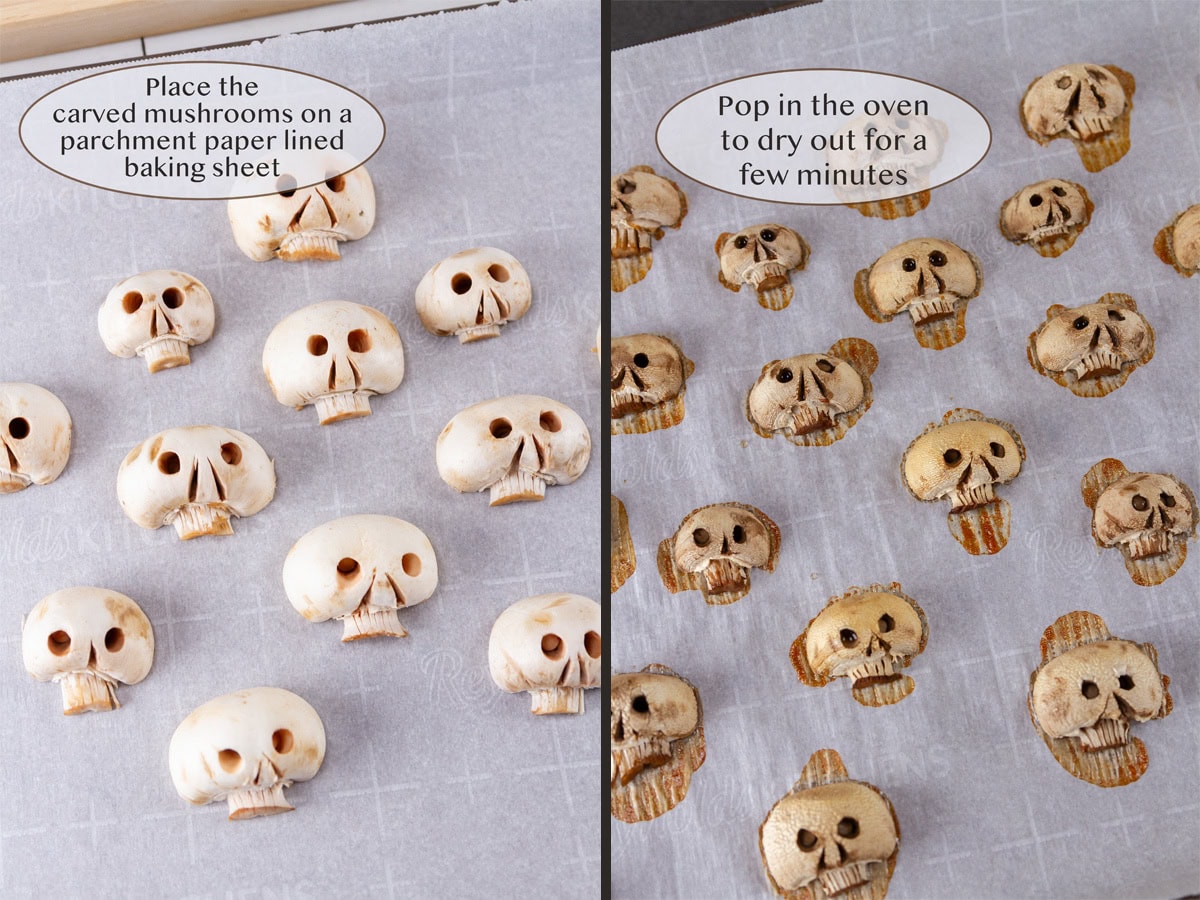
Place the mushrooms, cut side down, on a parchment paper lined baking sheet.
Bake for about 15 minutes, or until skulls look a little shriveled.
Can these be made ahead?
Yes, cut and baked skulls last a surprisingly long time in the fridge in an airtight container. Especially if you use really fresh mushrooms.
They can also be frozen for longer storage.
How to use
These adorable little skulls can be used anywhere you might like mushrooms.
- Serve them in soups or stews or salads
- On veggie platters, cheese plates, charcuterie boards for Halloween appetizers
- Garnish pizza with them
- Serve them on pasta, and for extra creepy factor, use squid ink pasta
- Mushroom skulls can be cooked into dishes as well as long as it’s a brief cooking time, you don’t want them to get mushy and fall apart
- Serve them with rice, and again that extra spookiness, use wild rice or forbidden rice for that nice black color
- Drizzle them with balsamic glaze for extra creep
- Having a Minecraft party? Use these skulls! These might also be fun for a tiki party
- Serve them with some Tarantula Cookies
Let’s keep in touch
If you like seeing my recipes subscribe via email in the upper right.
Or, connect with me on your favorite social media channel for recipes, photos, & much more:
Pinterest, Facebook, Instagram, YouTube and Twitter!
And find my shop on Amazon for recommendations on cool tools
If you try this recipe,
please come back & leave a comment below letting us know how it goes.
Share a picture & tag @lifecurrents on Instagram.
Or you can upload a “tried it” photo (I would love to see)
via the pin.
Recipe

Mushroom Skulls
Equipment
- Straw
- Knife
- Parchment Paper
- Baking sheet
Ingredients
- 8 ounces Mushrooms
Instructions
- Clean any dirt from the mushrooms, and slice them in half.
- Trim the stem end of the mushroom so that it’s straight and flat.
- Use a plastic or metal straw (don’t use paper) to poke two eyes into the mushroom. The straw can be any size, it doesn’t matter, you’ll just end up with bigger or smaller eye sockets. Use a boba straw for really big eyes. Remove any pieces of mushroom left in the eye socket. I found they came out easily by twisting the straw a little after you’ve inserted it.
- Use a small knife to cut two small slits for the nose. Remove any pieces of mushroom left in the nose slits. You can also make a triangle in the middle for the nose, which ends up looking a little like a jack-o-lantern.
- Cut a few lines down the stem of the mushroom to make the teeth.
- Preheat the oven to 375° F.
- Place the mushrooms, cut side down, on a parchment paper lined baking sheet.
- Bake for about 15 minutes, or until skulls look a little shriveled.
Notes
Nutrition
Nutritional information is based on third-party calculations, and should be considered estimates. Actual nutritional content will vary based on brands used, measuring methods, portion sizes, and more.


Debi
These are so much fun & perfect to add to soups, pasta, and salads. I hope you give them a try and have as much fun with them as I did. Debi, author, Life Currents