This post may contain affiliate links. If you make a purchase through links on our site, we may earn a commission.
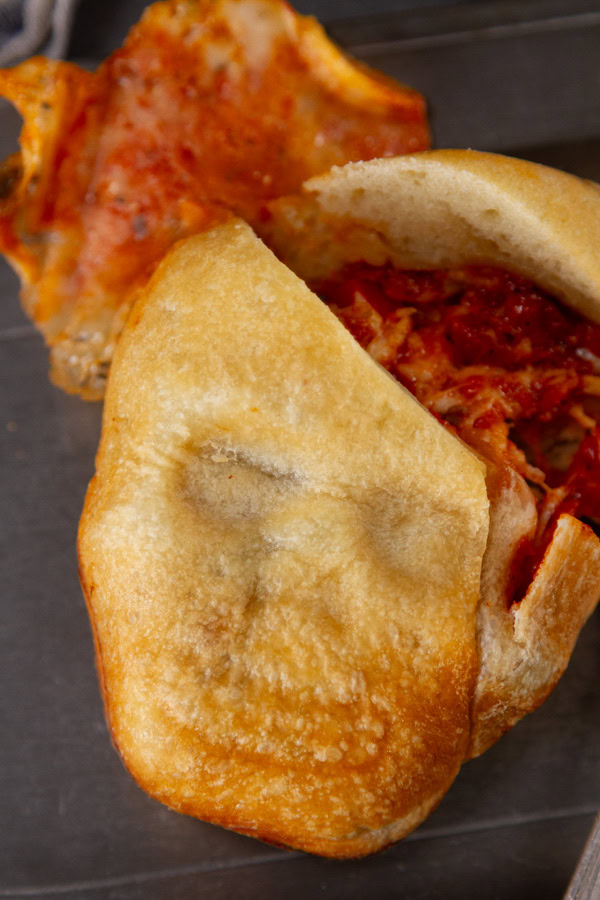
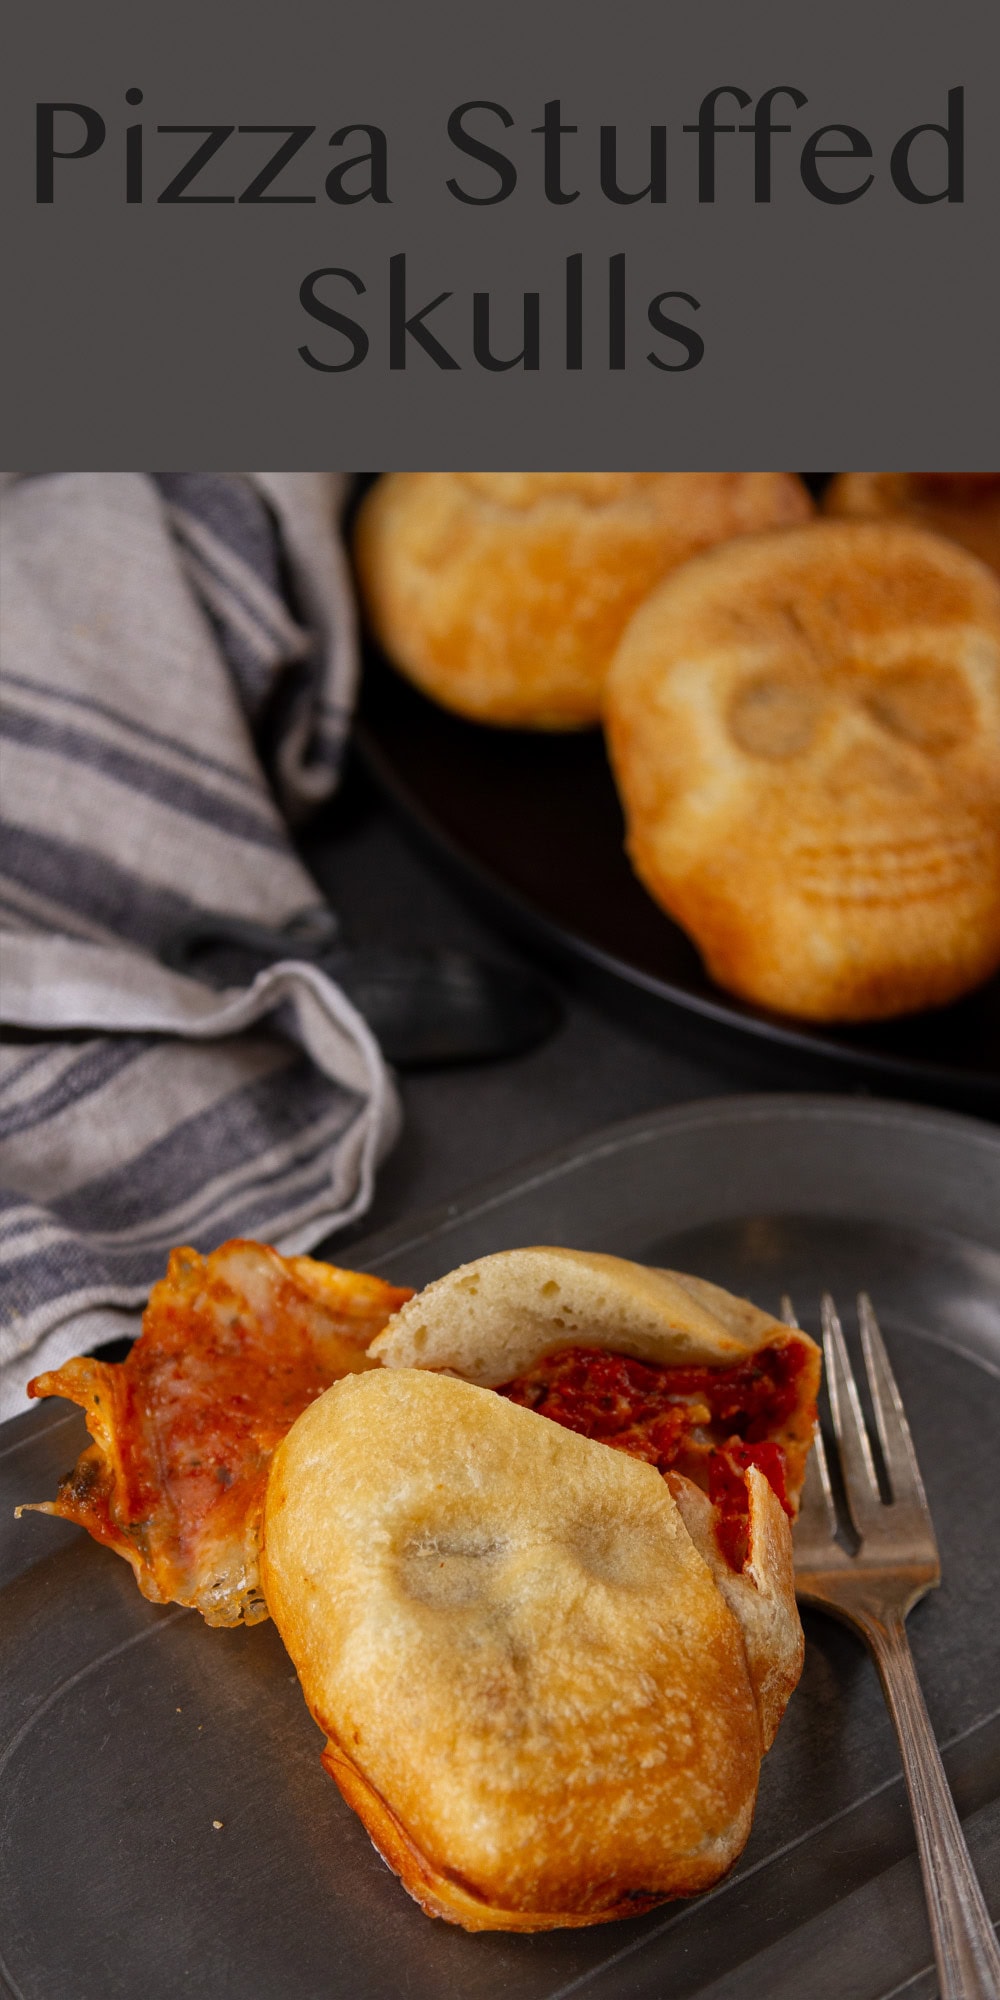
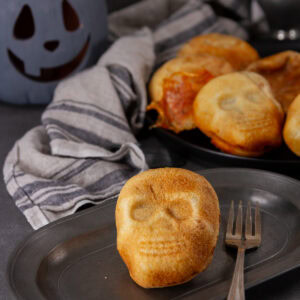
Aren’t these stuffed Pizza Skulls fun! A little fright, a deliciously scary recipe that’s kid-friendly, and a great addition to your Halloween dinner table. These are simple to make, and you can get the kids involved and have a fun Halloween activity as well.
Stuffed skulls are the perfect addition to the Halloween party or the office potluck. They’re easy to make using store-bought pizza dough, then stuff them with your favorite pizza toppings. They can be served as appetizers or as the main dish before you head out trick or treating.

We appreciate your support
Please let me know if you have any questions about this recipe. I read all the comments myself and I try to help as soon as I can. I have readers from all levels of comfort and experience in the kitchen on my site, and I’ve tried to answer some of your questions already in the post. But if I’ve missed anything, please feel free to leave a comment and ask.
Tailgating Snacks Month
I’ve included these awesome skulls in Tailgating Snacks Month because I think they are the perfect transition to Halloween. I mean, can it get any more perfect for both holidays!?!? Stay tuned, I’ll have a wrap up of Tailgating Snacks Month as well as October will bring all kinds of spooky treats!
My husband has taken to calling them pizza faces!
How to make
These cheesy, saucy, festive Halloween treats are really super easy to make. I’ve been wanting to make them for you for a while now. You know how much I love Halloween. Check out my Mozzarella Skulls and Mushroom Skulls for more skull fun.
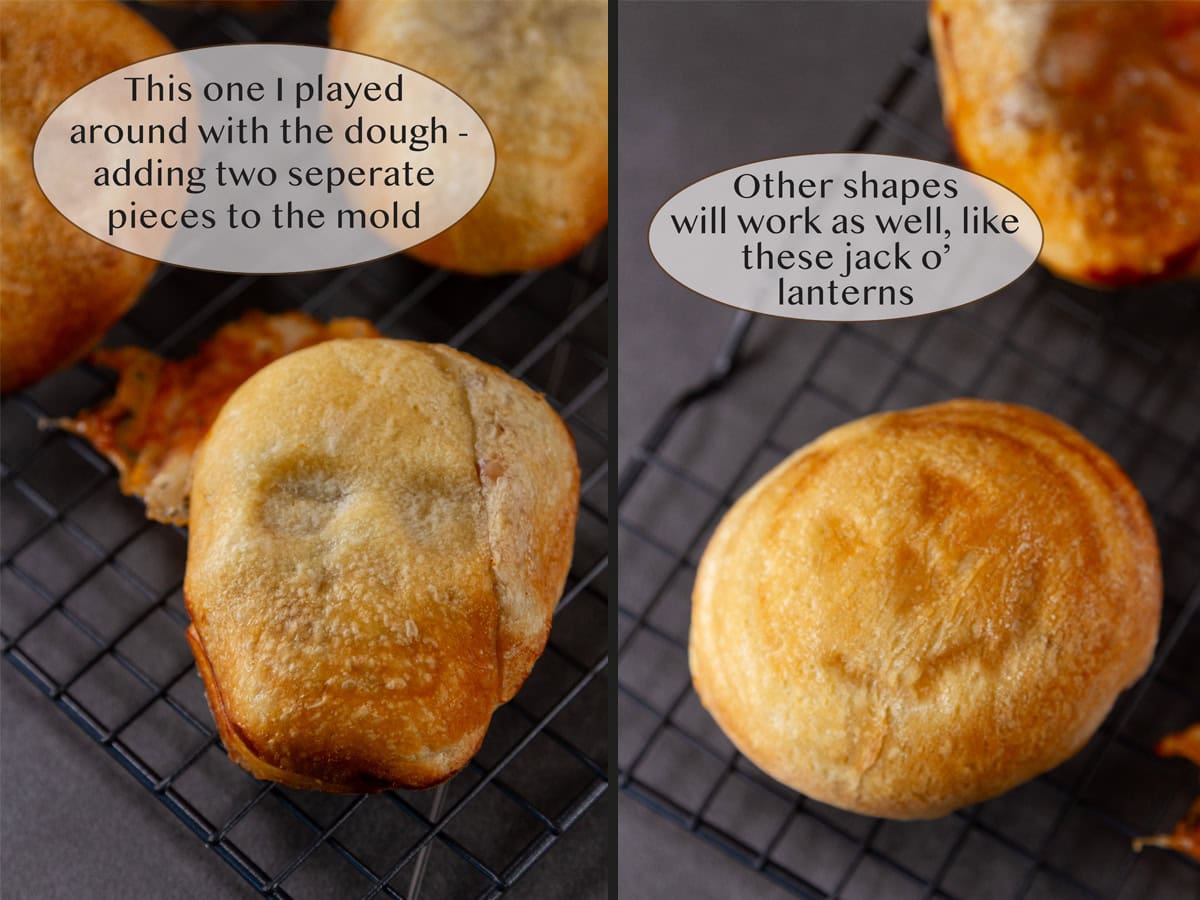
First, you’ll need to get a skull shaped mold pan. I recommend the Nordic Ware Halloween Bakeware, Haunted Skull Cakelet Pan. It has a great shape to the faces and a nice depth for adding pizza fillings into the skulls. You can see the Nordic Skull Pan results in my Skull Cakes and in my Skull Egg Bites. I own one of these pans, but right now I loaned it out to a friend, so I used a different set of skulls, one that had Jack o’ lanterns as well. It’s fun, and if skulls are too spooky for you, just know that other shapes work just as well, as long as they have large cavities in the pan so you can fit all that filling!
Be sure to scroll down for the full recipe with ingredients and instructions, but here’s the gist.
dough
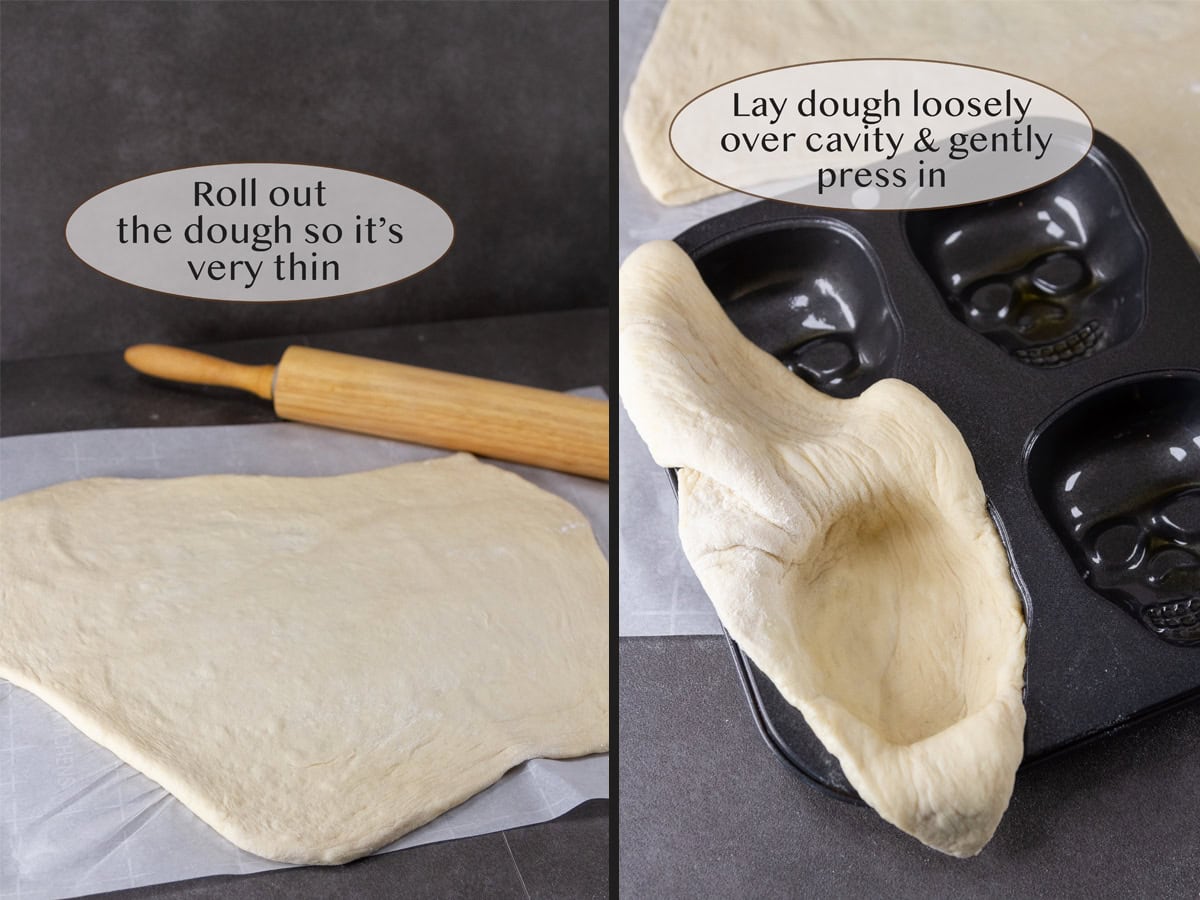
Roll out the pizza dough nice and thin. You can use homemade pizza dough, Pillsbury thin pre-made pizza crust, or store-bought pizza crust. I find the Pillsbury canned ones to be easy to use, but have a slightly off flavor, so my choice for convenience is the store-bought dough. I usually find it in the deli section of the store; Trader Joe’s also often sells pizza dough.
Cut dough into sections, slightly bigger than the skull cavity, to allow enough dough to seal on the back of the skull.
Lay dough loosely over cavity, so it dips into the well. Gently push dough to sides of the skull mold. Be careful to not pull dough too thin or a hole might form. If you do create a hole, either pinch the dough back together or add a little piece of dough to cover the hole.
I also played around with layering pieces of dough over the skull to give it a cracked look. I think it looks pretty cool after it’s baked (there’s a picture of it in the post).
filling
Next, you’re going to layer the pizza sauce, cheese, and toppings in your skullzone (skull calzone). And, as always, I highly recommend using my homemade pizza sauce (recipe linked above). It’s thick and rich and only takes a couple minutes to mix up. It won’t make your pizzas soggy at all.
I give you rough amounts in the recipe card, but keep in mind if you have bigger or smaller skulls, you’ll want to size the fillings accordingly. You want to almost fill the skull cavity – remember, the pizza dough will puff up a bit, and you still have to seal the back with the dough.
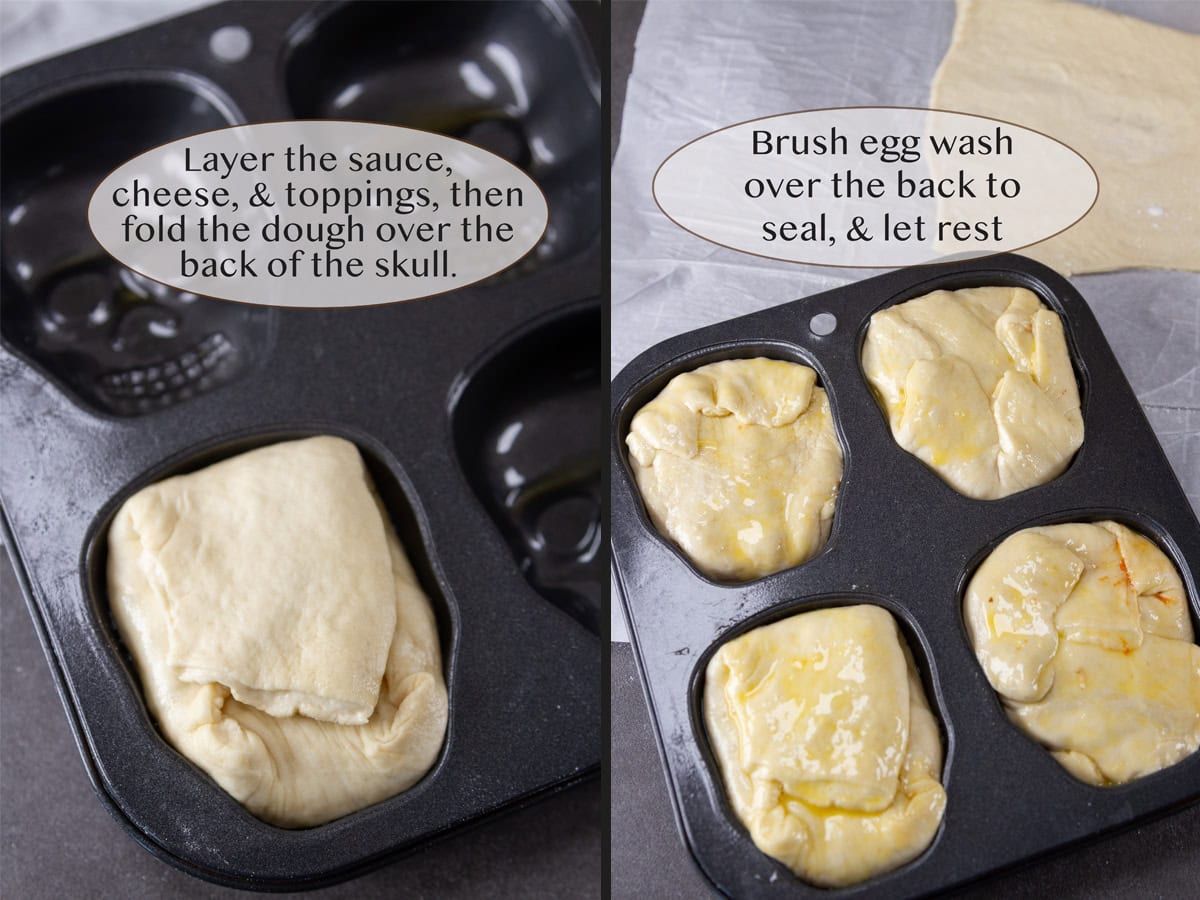
Fold the dough up over the back and seal the pizza. Cut off any extra dough and fold the dough over the back of the skull so it is completely sealed. Gently press down on dough into the mold so it takes the shape of the face.
Using a pastry brush, brush the egg wash on the back of the skull to seal the dough on the back of the skull.
Repeat with remaining ingredients until all skulls are filled. Cover the pan and refrigerate 15-30 minutes to seal pizzas.
bake
Place the skull pan(s) on a baking sheet to catch anything that might drip over the sides. And don’t worry if the filling escapes a bit, it’ll just make the pizza skulls that much spookier.
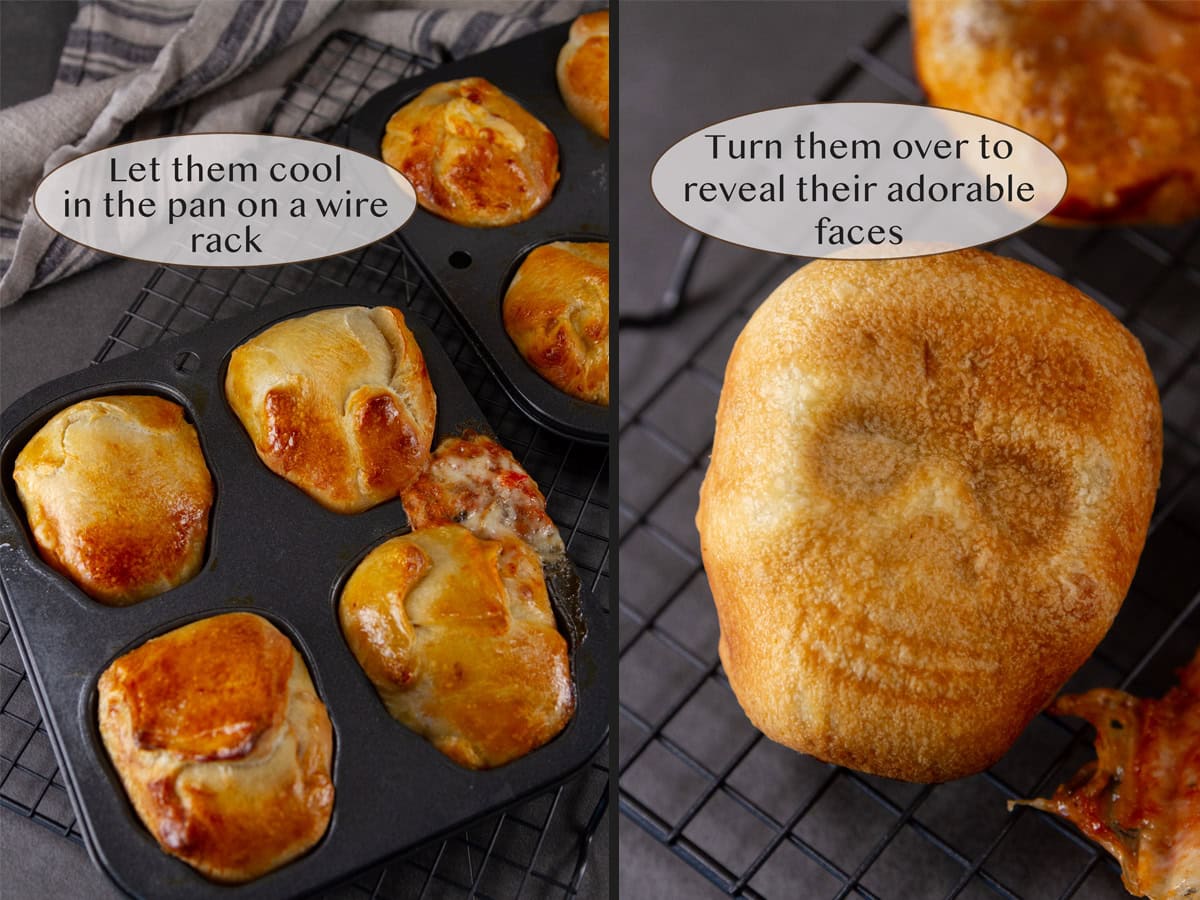
Bake the calzone-like pizza pockets in the preheated oven for 20-30 minutes or until the dough looks slightly crisp and light brown on top (be careful to not over bake). Let cool 10-15 minutes and invert onto a cooling rack.
Be careful, these are very hot in the middle so be sure to cool on cooling rack until desired temperature is reached before serving. Serve with additional pizza sauce on the side, or any other dipping sauces you like, like garlic butter dipping sauce, or ranch dressing.
When serving, you may want to fill the eye sockets or the mouth with pizza sauce and let it drip down the side of the skull.
Make ahead and storage
These skulls are best served the day they’re made. But, if you want to make them ahead for a party, refrigerate the pizza skulls in an airtight container for up to 3 days, then reheat them in a 350° F. oven for about 15 minutes until heated through.
For longer storage, freeze them for up to a month.
Other filling options
Feel free to use your favorite pizza fillings here – pepperoni, vegetables, black olives, sausage, whatever you normally like on a pizza.
Or, go wild, with pesto, Alfredo sauce, or marinara.
Really, if you have a skull pan you can make all kinds of things. Stuff the pizza dough with Mexican fillings for burrito or enchilada skulls with enchilada sauce, pepper jack cheese, corn, and roasted peppers.
Make cornbread or any quick bread in the molds. Make chicken or veggie pot pies.
Just make sure the toppings are chopped up nice and small so they fit inside the skulls, and don’t over stuff the pan.
Let’s keep in touch
If you like seeing my recipes subscribe via email in the upper right.
Or, connect with me on your favorite social media channel for recipes, photos, & much more:
Pinterest, Facebook, Instagram, YouTube and Twitter!
And find my shop on Amazon for recommendations on cool tools
If you try this recipe,
please come back & leave a comment below letting us know how it goes.
Share a picture & tag @lifecurrents on Instagram.
Or you can upload a “tried it” photo (I would love to see)
via the pin.
Recipe
Pizza Skulls
Ingredients
- 1 pound pre-made pizza crust dough homemade pizza dough, Pillsbury thin pre-made pizza crust, or store-bought pizza dough
- ½ cup pizza sauce
- 1 cup shredded mozzarella cheese
- ½ cup mushrooms diced
- ½ red pepper diced
- ¼ yellow onion diced
- 16 pieces pepperoni if desired
- 1 egg
Instructions
- Spray inside of skull pan with non-stick baking spray. Roll out pizza dough until very thin. Cut dough into sections, slightly bigger than the skull cavity, to allow enough dough to seal on the back of the skull. Lay dough loosely over cavity, so it dips into the well. Gently push dough to sides of the skull mold. Be careful to not pull dough too thin or a hole might form. If you do create a hole, either pinch the dough back together or add a little piece of dough to cover the hole.
- Spread about 1 tablespoon pizza sauce inside the dough. Sprinkle about 2 tablespoons cheese, plus a tablespoon or two of the fillings inside of dough, just enough to almost fill the skull cavity. Keep in mind if you have bigger or smaller skulls, you’ll want to size the fillings accordingly. Almost fill the skull cavity – remember, the pizza dough will puff up a bit, and you still have to seal the back with the dough.
- Make sure you have enough dough to fold over and seal your pizza. Cut off any extra dough and fold the dough over the back of the skull so it is completely sealed. Gently press down on dough into the mold so it takes the shape of the face.
- Whisk egg to create an egg wash. Using a pastry brush, brush the egg wash on the back of the skull to seal the dough on the back of the skull. Repeat these steps with remaining ingredients until all skulls are filled. Cover pan and refrigerate 15-30 minutes to seal pizzas.
- Preheat oven to 375° F. Place the skull pan(s) on a baking sheet to catch anything that might drip over the sides. Bake the pizza skulls for 20-30 minutes or until the dough looks slightly crisp and light brown on top (be careful to not over bake). Let cool 10-15 minutes and invert onto a cooling rack. Be careful, these are very hot in the middle so be sure to cool on cooling rack until desired temperature is reached before serving.
Notes
Nutrition
Nutritional information is based on third-party calculations, and should be considered estimates. Actual nutritional content will vary based on brands used, measuring methods, portion sizes, and more.


Debi
Not only fun but so yummy. These pizza skulls are loved by young and old. Easy to make too! I just know you’ll love them. Debi, author, Life Currents