This post may contain affiliate links. If you make a purchase through links on our site, we may earn a commission.
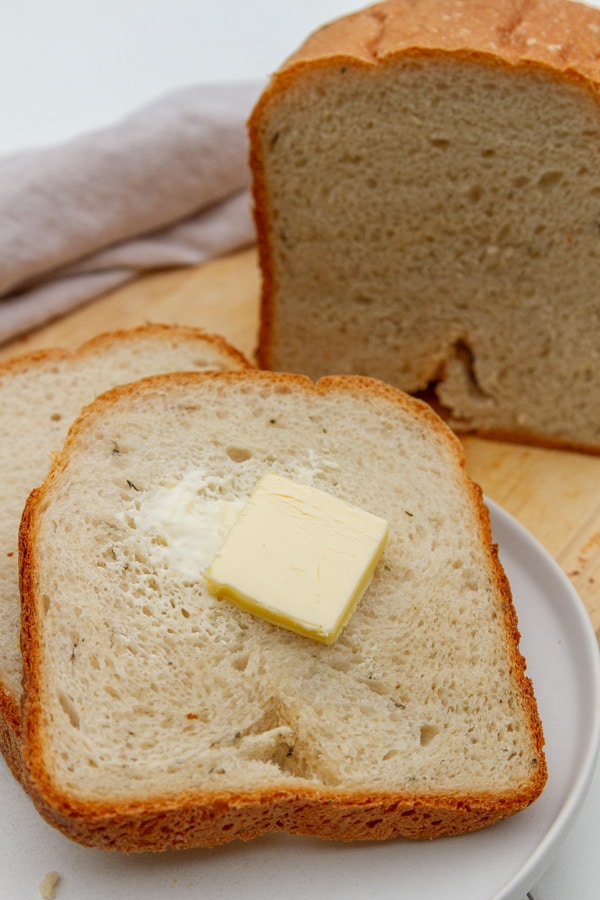
Use the bread machine for baking this wonderfully flavorful Garlic Herb Bread. This bread recipe makes a 1 & ½ -pound bread machine loaf that will fill your house with a beautiful aroma as it bakes. Of course, it’s delicious, and it’s great to serve with soup, salad, lasagna, spaghetti, or dinner. I also like to serve it toasted the next day with breakfast or make it into sandwiches!
This Bread is made in the bread machine and it comes out soft, light, and fluffy, and so flavorful that you can eat it plain! Gussy it up by serving it with Garlic Butter Dipping Sauce or Garlic Dipping Oil.
I’m still without a kitchen due to the remodel, and I’m trying new things. Well, more accurately for this recipe, I’m going back and rediscovering old recipes that I loved and had forgotten about.

We appreciate your support
Please let me know if you have any questions about this recipe. I read all the comments myself and I try to help as soon as I can. I have readers from all levels of comfort and experience in the kitchen on my site, and I’ve tried to answer some of your questions already in the post. But if I’ve missed anything, please feel free to leave a comment and ask.

Bread Machine
This recipe came with the very first bread machine I ever got. It’s still my favorite out of all the recipes I have tried. I even included this recipe in my Cupboard Cooking cookbook (though I have changed it a bit since then).
My bread machine is old, and has made many a loaf of bread! It still works great. But I do see some great new machines on Amazon. Check out this one.
If you get a new one, make sure it can bake up to a 2-pound loaf. You can always bake a smaller loaf in a machine, but you don’t want it to overflow.
The bread machine does all the work for you. It kneads, it shapes, it rises in the perfect temperature, and it bakes.
I also like that the bread machine keeps cat fur out of the dough.
And, if you want to shape the bread in a different way, like rolls or breadsticks, or smaller loaves you can just use the dough setting. Then shape the dough however you like and bake it off.
How to make
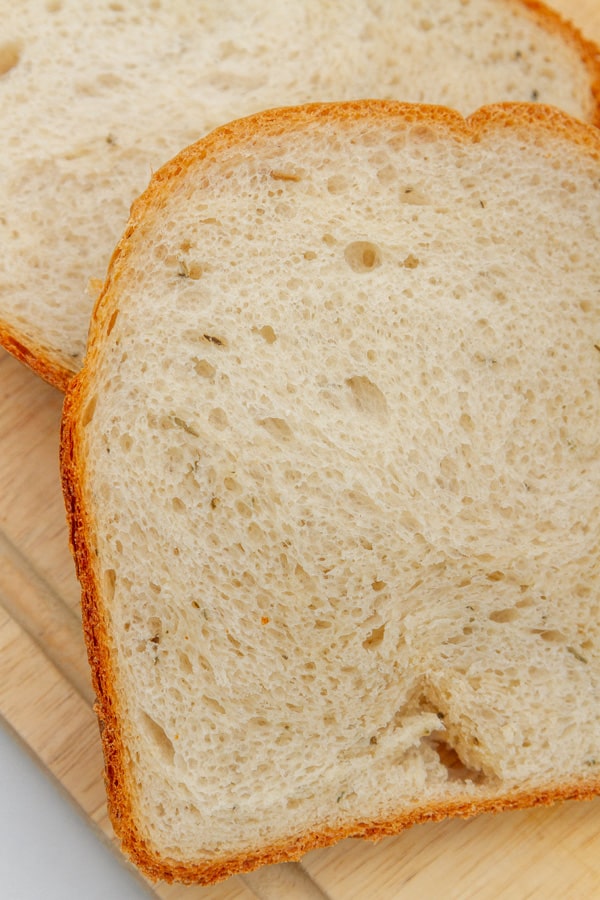
This bread is a basic white bread loaf made in the bread machine. It uses water, Instant yeast, olive oil, seasonings, and bread flour. The bread gets a great rise and nice crumb from these ingredients.
The full printable recipe ingredients and instructions are available in the recipe card at the bottom of the post. You can find important tips and tricks in the post.
Be sure to follow the instructions for your bread machine. I’ve given the general instructions that should apply to most bread machines. I’ve had many different machines and brands throughout the years, and this recipe has always worked well in all of them.

Make sure to add the ingredients in order:
- Liquids/ wet ingredients go to the bottom of the insert, including eggs, sour cream, yogurt, oil, butter
- Seasonings such as sugar, salt, herbs, spices, dried milk (in the picture I added the spices to the top so you could see them. Normally I add them with the liquid so they dissolve well)
- Flour
- Instant yeast goes in a little well in the flour (I’ll talk a bit more about yeast a little lower as well)

Don’t allow the yeast to come in contact with the liquids. This is especially important if you’re using the delay baking function.
The liquid doesn’t need to be warmed to dissolve the instant yeast, which is a great time saver over traditional bread baking. The friction from the paddle will warm everything up just enough.
Pro tip: be sure the insert is in the bread machine if you’re going to measure everything directly into the machine. Um, I may have made the mistake once of not having the insert in the machine and having a big mess to clean up after adding liquid directly to the machine.
Place the handle of the bread machine so that it’s slightly up, but make sure it doesn’t interfere with closing the lid. I’ve had batches of breads that have baked up so high that the bread bakes into the handle making it very difficult to get the basket insert out of the machine when it’s super hot and you don’t want to burn yourself.

Set the machine following the manufacturer’s instructions, by selecting a basic white bread setting on the bread machine, the loaf size, (1 & ½ pounds) and the crust color, and press start.
For the loaf you see in the pictures I choose medium crust color. If you’re new to the bread machine I suggest starting with medium and then seeing if you want a darker or lighter crust on your bread.
Here’s where you would select the dough setting before baking if you want to make different shapes with the bread.
Now let the bread machine do its magic.
Once the machine is done, remove the loaf from the machine and from the basket insert. Allow the loaf to cool for at least 5 to 10 minutes. The steam trapped by the crust inside the bread is still baking the bread, and releasing that steam too soon can make the bread slightly underbaked or gummy.

When you’re ready to slice the bread open, be sure to carefully remove the paddle from the loaf if it stuck inside the bread. The paddle will still be hot, and you don’t want to try and slice into the paddle with a knife.
And I suggest using a bread knife for this. This is my favorite bread knife.
The bread will keep for a few days. Store it in a bread box or airtight container at room temperature. Older bread can be freshened up by toasting it or by spreading with butter and toasting the buttered side in a pan until golden.
If you want to store the bread for longer, wrap it in foil then in a freezer safe zip top bag and store in the freezer for up to 3 months.
Looking for another great and easy to make bread, check out my 3 ingredient bagels.
Yeast
I recommend instant yeast for work in a bread machine. In fact, some yeast actually calls out on the label that it’s recommended for bread machines.
The fine dry yeast granules dissolve instantly in the bread machine when they’re mixed in. So, you don’t have to dissolve them in warm water first (like you do for traditional bread recipes).
Instant yeast varies by name from one brand to the next.
- Red star is called quick rise yeast, fast acting, or fast-rising instant yeast
- Saf-instant: you’ll want red instant yeast for this recipe. Gold instant yeast is for sweet dough.
- Fleischman’s is called rapid-rise yeast or bread machine yeast
One ¼ ounce packet equals about 7 grams or 2 & ¼ teaspoons of yeast. So you’ll use a little less than a packet in this recipe.
Can I make this with no yeast?
This bread is made to be risen with yeast.
I accidentally made a loaf once and completely forgot to add the yeast. I got a hard cracker like thing, that I ended up throwing away.
Quick bread is the term for breads without yeast. And I have a few of those recipes if you want to check them out. Zucchini date bread, bourbon banana bread, and orange marmalade bread. I also have a no yeast flatbread that you’ll love.
Variations
Use this basic recipe to make dinner rolls, bread rolls, bread sticks, herb pull apart bread, or even a single large round loaf. Simply use the dough function on the machine, then shape the dough however you want.
Bake in an oven at 350° F for about 25 to 35 minutes, baking time will vary based on shape of dough.
You can also use this recipe as a starting point for adding different flavors.
Try adding some cheese, Garlic Parmesan herb bread is fantastic, cheddar cheese or go fancy with Gruyère cheese.
I’ve used dried herbs for the recipe because they’re shelf stable and always available, but feel free to use fresh if you prefer. Dried herbs are often more potent than fresh herbs, so you need more fresh herbs. Use 1 tablespoon of fresh herbs to 1 teaspoon of dried herbs.
Use fresh garlic cloves if you’d like as well. Fresh garlic is 1 clove to ¼ teaspoon dried garlic. So, use 2 cloves of garlic, pressed or minced for this recipe. Or, go super garlicky and use more if you like.
This recipe is already naturally vegan, so it’s great for serving at dinner parties and holidays.
You could add different seasonings like Italian Seasoning blend or nutritional yeast as well.
Serving suggestions
This herb bread goes so well with soup. Try it with Rice Cooker Tortilla Soup, Easy Tomato Soup or Minestrone. Or make some delicious Mushroom Soup or Crock Pot Vegetable Soup to go along with it. Serve it with some delicious Tahini Wild Rice Soup.
Serve it alongside some delicious Spinach Provolone Baked Pasta or a fantastic Meatless Meat Lasagna.
Dip it in some red pepper feta dip.
It’s a great classic dinner served with some Meatball Casserole.
Let’s keep in touch
If you like seeing my recipes subscribe via email in the upper right.
Or, connect with me on your favorite social media channel for recipes, photos, & much more:
Pinterest, Facebook, Instagram, YouTube and Twitter!
And find my shop on Amazon for recommendations on cool tools
If you try this recipe,
please come back & leave a comment below letting us know how it goes.
Share a picture & tag @lifecurrents on Instagram.
Or you can upload a “tried it” photo (I would love to see)
via the pin.

Recipe

Garlic Herb Bread in Your Bread Machine
Ingredients
Instructions
- Add the liquid ingredients (water and oil) to the bread machine basket insert.1 1/4 cups water, 1 tablespoon olive oil
- Add the seasonings and flour on top of the liquid ingredients. Make a small well into the flour with your finger and add the dry yeast to the depression. Make sure you do not allow the yeast to come in contact with any liquids.2 tablespoons sugar, 1 1/2 teaspoons salt, ½ teaspoon garlic powder, 1/2 teaspoon dried rosemary leaves, 1/4 teaspoon dried thyme leaves, 1/4 teaspoon dried basil, 3 1/4 cups bread flour, 1 ½ teaspoons instant yeast
- Select the basic setting on the bread machine, select the crust color, and the loaf size of 1 & ½ pounds. Start the machine.
- Once the bread is finished baking, allow it to cool for 5 to 10 minutes before slicing it open.
Notes
Nutrition
Nutritional information is based on third-party calculations, and should be considered estimates. Actual nutritional content will vary based on brands used, measuring methods, portion sizes, and more.


Megan
Came out great!
Li
This was delicious! My youngest said it was the “best bread ever, even better than the store and restaurants!”
Liz Tatman
Hi can I add a larger amount of herbs?
Debi
Liz, yes, you can add more herbs if you want.